Festivals are one of the best subject to photograph. Besides the fact that these are usually ancient traditions that often have historical or cultural significance, they also transform that destination into a giant studio. It is usually the one occasion where most people – performers and audience – don’t mind having their photo taken without permission. But photographing festivals isn’t necessarily straight forward as you are often in amongst crowds as well as challenging light conditions if indoors. Follow these simple tips and you’ll be on your way to capturing great photos.
Get Close
The first thing you would usually need to do when photographing festivals is to get close to the action or your subject. Unfortunately, you won’t have the luxury of having the place to yourself and so to avoid people walking across your photos you need to get close to the subject.
Clearly when the festival is a parade, that may not be possible as you won’t be allowed to venture into the road. In those situations, the location you choose is vital so it pays to do some scouting beforehand and find a good place. It will be difficult to relocate once the crowd has gathered so choose wisely.
Pick Up The Details
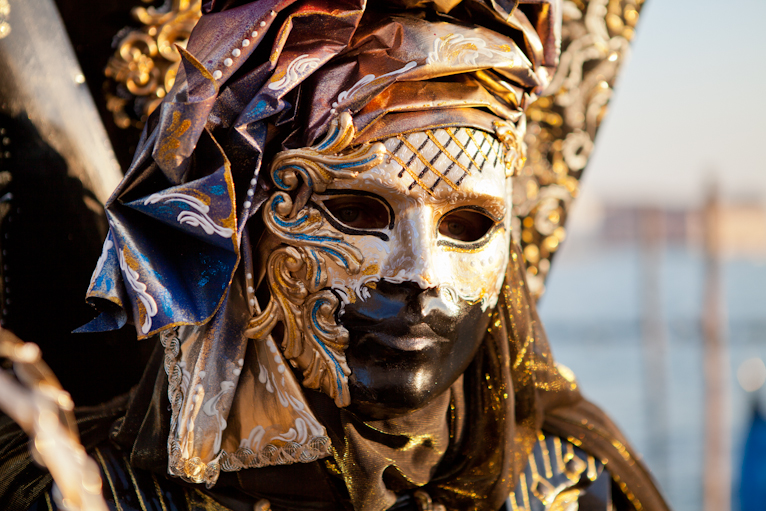
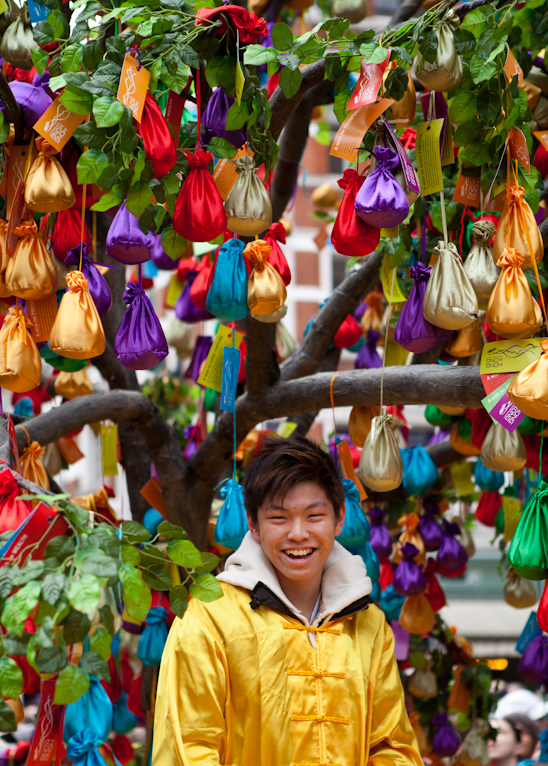
Often festivals involve beautiful clothes or costumes and these are as much a part of the traditions and customs as the performers so it’s a good idea to try and incorporate some of these photos in your shot list. You will need to get close enough to fill the entire frame which means either asking your subject to stand and model for you, or using a telephoto lens to zoom in. Either way the details of the costumes are often missed by the naked eye and make for great and interesting photos.
Pay Attention To Surroundings
There is nothing more frustrating than framing a great photo with your subject and capturing the perfect moment and then subsequently noticing a power line or a telephone booth. This is even more frustrating when the photo is representing a traditional festival which is then ruined with modern inventions. The best way to avoid this all together is to really look and think about your surroundings before you start taking photos.
When you have chosen your location, have a good look around and make a mental note of which angles you need to avoid where it will give you those unwanted additions.
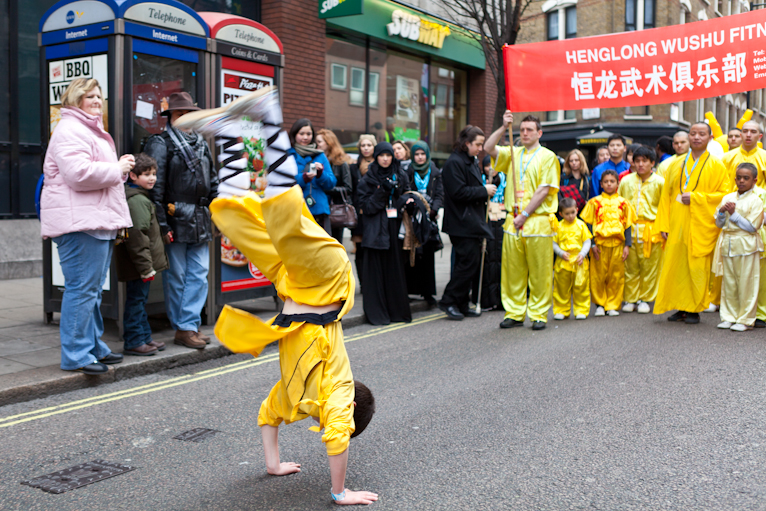
The phone booths look out of place in this shot
Don’t Forget Your Zoom Lens
Some festivals will require you to be too far away from your subjects behind barriers to be able to manually get closer to your subjects. That’s where a good telephoto lens can be invaluable as it can help you isolate individuals or a small section of a large performance. But you don’t just need to use these lenses when you are far away from your subjects as telephoto lenses are also ideal for capturing portraits or even zooming in to capture details. Yes they are bulky and a hassle to carry around, but they can be very useful when photographing festivals.
Don’t Forget The Audience
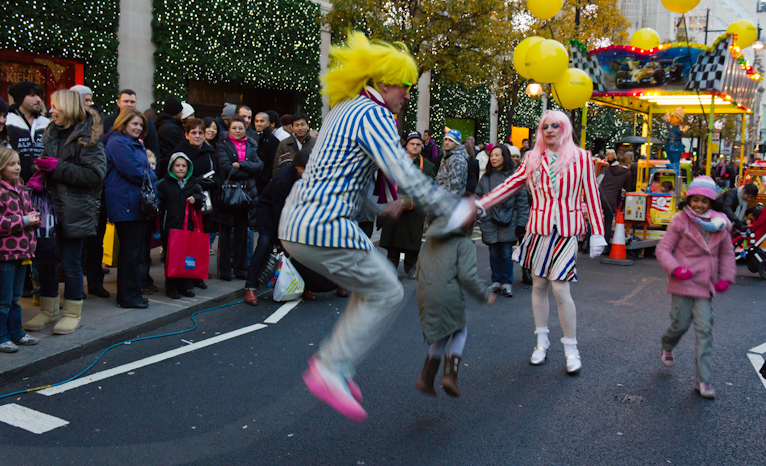
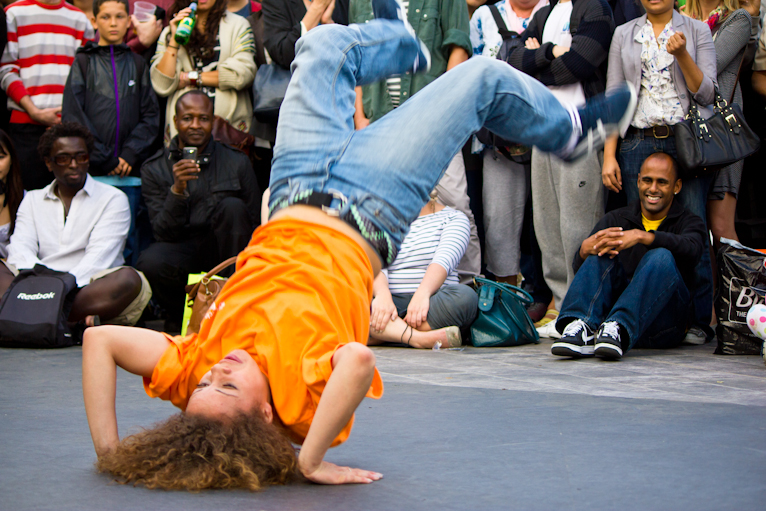
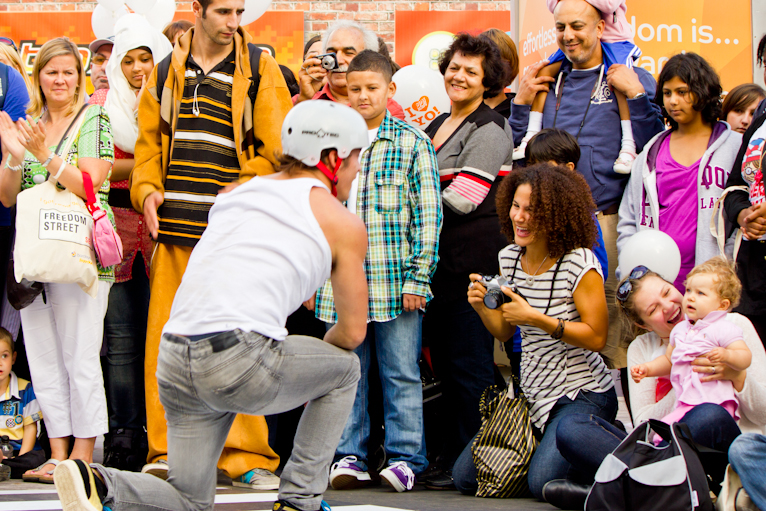
When photographing the amazing scenes in front of you at a festival, it’s often easy to forget what’s happening in the crowd. That’s an opportunity missed as the audience is a big part of capturing a festival. You just have to look around to see the amazement, joy and even sadness that is being displayed all around you. These are unique moments that add to the atmosphere and can look fantastic in your portfolio. The key is to keep your eyes open and try to capture these moments in a candid way. If you can, you will be incredibly please with the results.
Bring Lots Of Memory Cards
The best way to photograph festivals is by shooting continuously as you won’t always be able to capture your best photo in just one shot. So the best thing to do is shoot as continuously as you feel you need to and then choose the best shot in post production. But this means you will need a lot of memory cards especially if you are photographing in RAW files. It’s not unfeasible to fill a 16GB card in just a few hours so to avoid the disappointment of missing shots because you are trying to delete some, come prepared.

Camera Settings
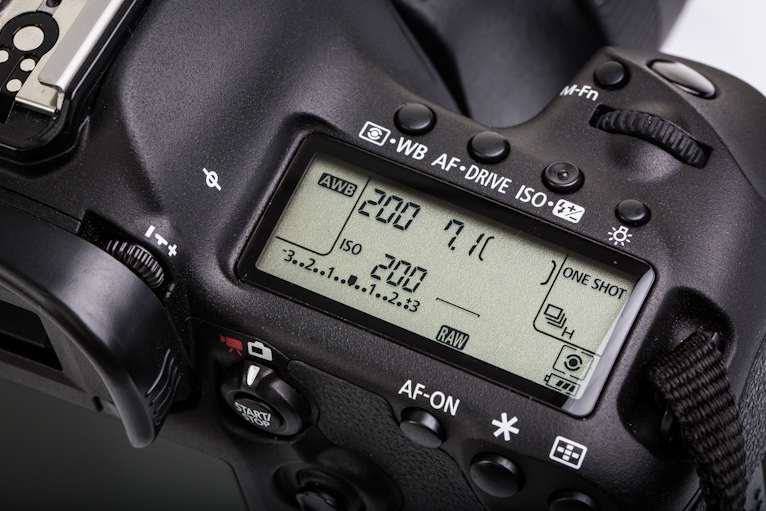
The key thing about photographing festivals is to be ready for anything as there isn’t one setting that works for all scenarios. You need to assess the situation and then set your camera settings accordingly. Below are some tips to help you:
Aperture Priority or Shutter Priority – both have their uses and should be used accordingly. If you are photographing something that requires you to capture it at minimum shutter speed to avoid blurred photos, then opt for shutter priority. But if you want to control your depth of field then you’ll need aperture priority. Whichever you choose, it is still important to pay attention to the other.
Fast shutter speed – if you want to freeze the action then you need to set a fast shutter speed. You need to be at around 1/250sec at the least but often faster if the action is moving quickly. But not everything needs to frozen and sometimes motion blur can actually add some dynamism to the image. The slower your shutter speed the more motion blur you will have, but the key for this is that it needs to look intentional and not just an accidental blurred photo.
ISO – occasionally you will need to raise your ISO to ensure that you can have a fast enough shutter speed to freeze the action and not suffer from camera shake. In these instances you need to raise your ISO but you should always do so with some caution. The higher your ISO the more noise your image will suffer from. Check your camera’s capabilities to have an idea of how high you can push your camera’s settings.
Festivals are terrific subject to photograph and can give you once in a lifetime images. But they are also not easy and will require a fair amount of practice to master. You need to work fast and so understanding your camera and its settings are vital. But the great thing about festivals is that you often have a whole load of people who would happily model for you and with practice you can capture great photos.
Latest articles by Kav Dadfar (see all articles)
- How To Photograph Street Performers - April 26, 2022
- Profiled Photographers – Ben McKechnie - August 24, 2021
- Profiled Photographers – Jim Maher - August 24, 2021
is the founding editor of JRNY Travel Magazine as well as a professional travel photographer and writer based in the UK. His images have been used by clients such as Condé Nast, National Geographic, Lonely Planet, Rough Guides and many others. Kav is also the co-founder of That Wild Idea, a company specializing in photography workshops and tours both in the UK and around the world.
See All Articles by Kav Dadfar


Leave a Reply