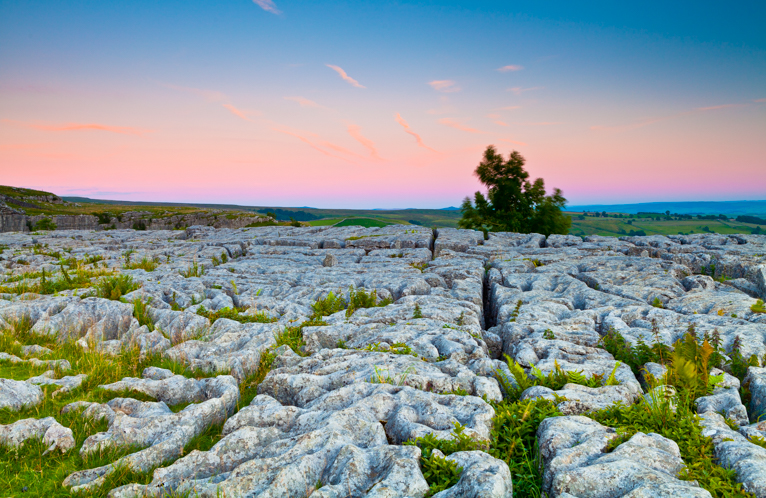
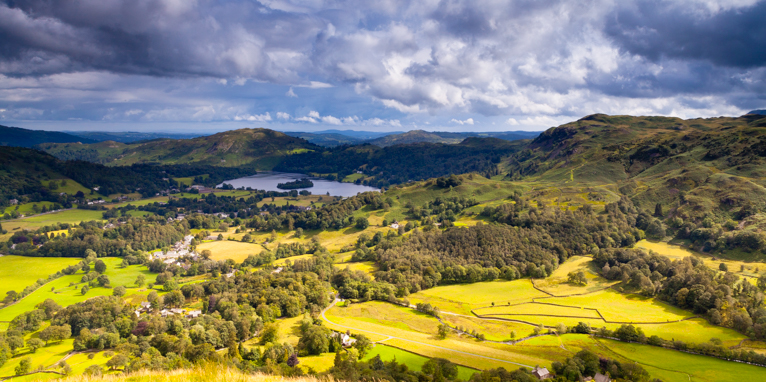
Who doesn’t like seeing a stunning landscape shot. Whether it is in a magazine or newspaper, online or even as a framed poster, landscape photos have the power to stun the viewer. Here are 6 tips to help you capture stunning landscape photos.
1. Research Well
If you want to capture stunning landscape photos, your first step should be to research your location or area that you are trying to capture in detail. Landscape photography requires many aspects to come together and leaving it to chance will usually leave disappointed.
Start by looking at maps of the area and work out where your lookout point will be. You’ll need to check that the particular point you have chosen is going to be accessible, safe and also give you a clear view of what you want to capture. It is pointless turning up somewhere and finding that because of your elevation your view is obstructed by a hill.
One you have worked out your location, check the direction of the light. You’ll need to determine what sort of light you are looking for and plan your shoot accordingly. And don’t forget to always check the weather before you set off on any trip, the last thing you want is to hike to a location for a few hours and be faced with poor visibility which won’t give you the shot you want.
2. Timing Is Key
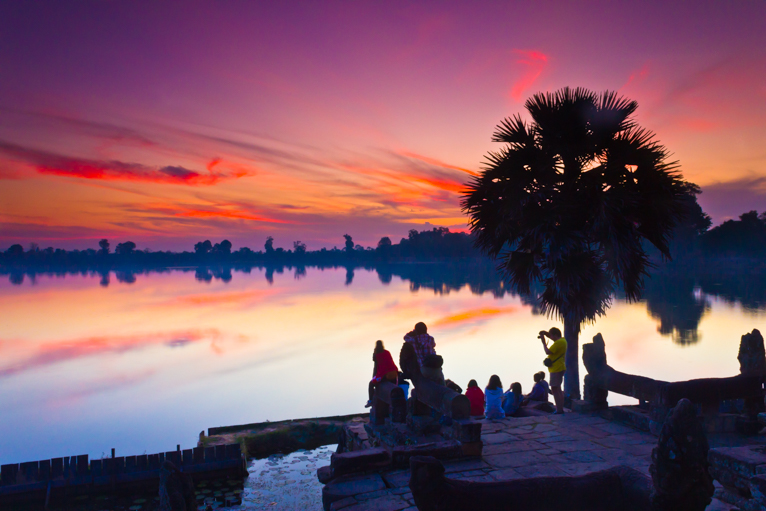
Most people will tell you that the best time for landscape photography is either early morning or late afternoon in the time called the “golden hour”. This is because a sunny day the light is soft and golden and can really enhance shadows and give the whole scene a warm and beautiful glow.
But that doesn’t mean that you should discount photographing landscapes at other times in the day. You probably have to just work and think harder about how to frame and execute your shot to capture stunning shots. Think about the look and feel that you are trying to achieve and through your research get the timing of your shoot correct.
3. Where Is The Light?
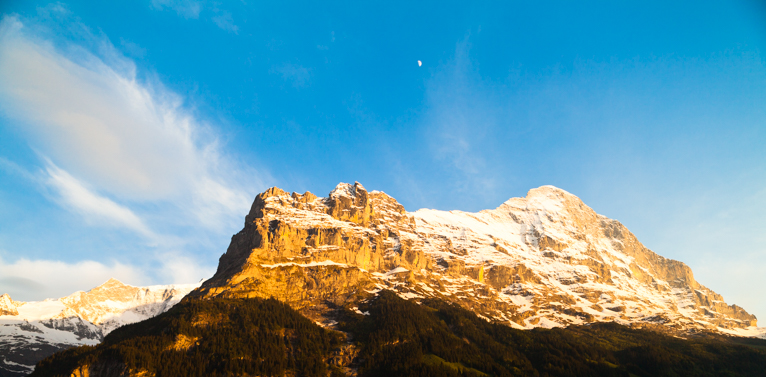
Light plays such an important part in landscape photos that you will often find that even the most stunning landscapes can look dull and uninteresting if not lit correctly. So play close attention to direction of the light and use it to your advantage. For example, if you are photographing a mountain range, you may need the light to be shining for one side so that it lights up the face of the mountain. Or alternatively you may want a silhouette effect in which case you need the light coming from behind the subject.
Whatever your vision for the image is, how you light the scene will have a significant impact on making it a reality.
4. Frame Carefully
One of the amazing things about landscapes is that it usually leaves us stunned when we see them in real life but sometimes transferring that to an image can be difficult. The way that you compose your photo is vital in what the end result will look like so take your time and be patient with it. Spend a few minutes just sitting and looking at the view. Absorb what’s in front of you and begin to visualise in your mind what you want the final result to look like.
Once you are ready, frame your shot and look through the viewfinder. Take a snap if you feel it works and then evaluate it. Does it work? If you answer no, then try to work out why it doesn’t. Is it because it is missing a sense of scale? Is it because it needs a foreground point of interest? Or is it just that you need to show more sky? Whatever the answer is then frame your shot again and take another photo. Keep running through this process till you feel that the photo is the best it can be.
5. Depth Of Field
One of the most common questions that I get asked is “why are my landscape photos not sharp”. There are lots of reasons that a photo may not be sharp and if your photos suffer from this then should investigate further and understand why. It could be your hardware that you are using i.e. your camera, lenses or even filters. It could be because you are not using a fast enough shutter speed for handheld photography. Or it could be because you haven’t set your depth of field correctly.
There are tons of material out there on the web that can teach the technical elements and science behind depth of field but in short, if you want more of image to be sharp (i.e. the foreground and background) then you need a higher f-stop. If you want a shallower depth of field (i.e. the background more blurred) then you want a smaller f-stop number.
For landscape photography, the majority of the time you want more of the photo to be sharp and so you want to select a higher f-stop number (but be careful going too high as this can have an adverse effect of the sharpness). Start at around f/8 and work your way up. You will usually find that anywhere between f8 – f/16 will give you the desired effect.
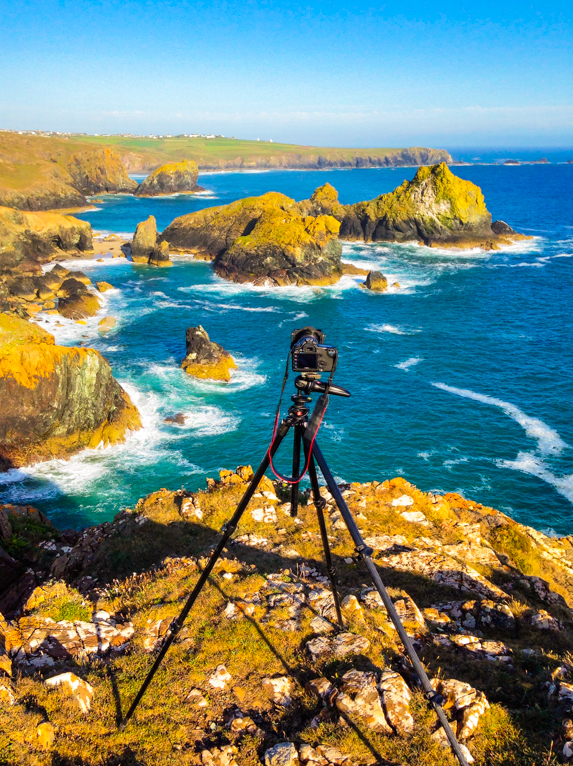
6. Use A Tripod
Simply put, if you want to capture the best possible photos, at the possible time, with the best quality, you should use a tripod. At certain times like when the light is low or you want to select a slow shutter speed you simply would not be able to hold the camera steady enough to avoid camera shake. The only solution in these scenarios without a tripod is to raise your ISO which means noise in the final image. Too much noise and your image will look soft and not sharp enough. There’s a reason most photographers will tell you that their tripod is their favourite and most important camera accessory.
Landscape photography is often a favourite of most photographers. After all a stunning landscape shot wouldn’t look out of place hung on someone’s wall. Taking landscape shots isn’t straightforward and you are often battling the elements, but the good news is that with a little practice and a lot of research you’ll capture stunning landscape shots in no time.
Latest articles by Kav Dadfar (see all articles)
- How To Photograph Street Performers - April 26, 2022
- Profiled Photographers – Ben McKechnie - August 24, 2021
- Profiled Photographers – Jim Maher - August 24, 2021
is the founding editor of JRNY Travel Magazine as well as a professional travel photographer and writer based in the UK. His images have been used by clients such as Condé Nast, National Geographic, Lonely Planet, Rough Guides and many others. Kav is also the co-founder of That Wild Idea, a company specializing in photography workshops and tours both in the UK and around the world.
See All Articles by Kav Dadfar


Leave a Reply