The affordability and the improvement in the quality of drone cameras have led to an explosion of photographers investing in them as part of their equipment. I must confess that until recently I had been reluctant to take the leap into this new area of photography. But having used drone for a while now, there is no doubt of the potential that drones offer a photographer. But capturing good drone photos isn’t straightforward and requires the same consideration and planning as taking photos on the ground with a camera. So here are 6 drone photography tips to help you capture better photos with your drone.
Research and planning
Like any type of photography, successful drone photography also requires the same level of preparation and planning as regular photography on the ground. In fact, in some ways, drone photography requires even more planning as you also have to take into account the safety of other people, your drone and potentially other hazards such as power lines, wildlife and planes.
There is also another reason that research and planning are so important when it comes to drone photography. Drones have limited battery power. For example, the popular DJI Mavic Pro 2 has a battery time of around 30 minutes (less in cold conditions). So if you are not prepared you might waste valuable flight time trying to find the right composition. So before you begin any flight you should have spent a bit of time doing some research and planned your shoot.
Start by checking if you are allowed to fly a drone at the location you are planning. Keep in mind that for example in US National Parks flying a drone is banned. There are also no-fly zones near airports and military areas. There are plenty of apps that can help you but it is down to you to do your research.
Once you have established that where you are planning to fly is safe, have a look on Google earth to find the right spot for your composition. By having the shot in mind it will help you get straight to your location and capture the shot you want.
Know the capabilities of your drone
As advanced as drones have become, they are still some way off the capabilities of high-end DSLR cameras. Unfortunately, the sensor size isn’t as big as a full-frame DSLR and this can have an impact on the quality of your photos. There is also the issue around stability when you are flying. As steady as a drone can remain in the air, it still will not be capable of being steady enough for slow exposures. Even shutter speeds that might normally be fine handholding might be a challenge for a drone as even the slightest gust of wind will move the drone. This would mean that you will have to raise your ISO to keep your shutter speed fast which again can mean poor quality photos.
So to capture good drone photos you need to spend a little bit of time getting to know your drone. Try to practice in different conditions and look at the results on your computer to see how things like ISO and shutter speed impact the quality of the photo. It’s far better to know the implication of raising your ISO in a couple of practice shots than in a photo while you are on location.
When zoomed in you can see that this photo isn’t sharp even when the shutter speed was 1/80 sec due to the wind.
Try pano modes
As mentioned above, drone camera sensors are not as powerful as high-end DSLR cameras. Which can be problematic when for example you want to crop into a photo. Thankfully there is a way that you can get around this issue. Some drones such as the DJI Mavic Pro 2 have really great pano modes. There is a sphere (which I never really use), verticle pano, 180-degree pano and horizontal pano (a normal 4;3 ratio).
The 180-degree and vertical panos are what you would generally see in panoramic photos. In these modes, the drone will take multiple shots and stitch them together to create a wide (or long photo). The Mavic Pro 2 also has another pano mode called “horizontal” in which it takes 9 shots and stitches them together to create a bigger 4:3 photo than you would be able to capture in a single shot using a drone.
The other benefit of this is that it allows a much wider angle of view than would be possible with the 28mm camera on the drone. Because this photo is bigger in size it also allows greater flexibility for cropping your photo.
Note: you can also stitch the photos together yourself in an editing software rather than using the one that the drone stitches together.
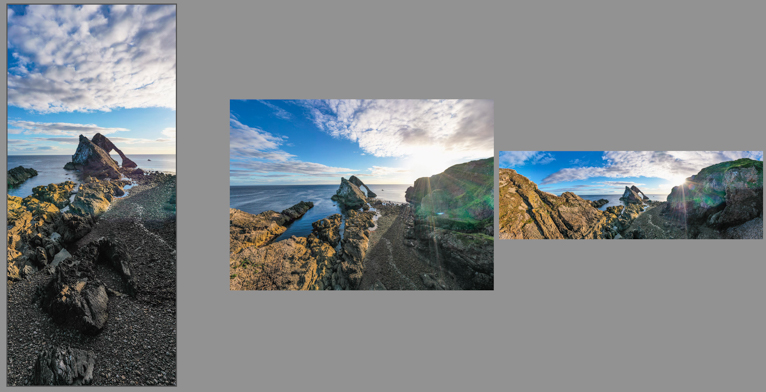
Left: verticle pano. Middle: 4:3 horizontal pano. Right: 180-degree pano.
Compose your image carefully
One of the big pitfalls of drone photos is that it is easy to get caught up in the high angle of view and forget to compose your shot correctly. So it is important to still keep in mind some of the composition techniques that you would use for photos on the ground. Things like the rule of thirds or where you place your horizon line are incredibly important. As is thinking about the direction of the light in relation to your subject. Keep in mind that if you are shooting in pano modes such as the ones above, you will have to shoot with any cropping in mind. So, for example, you may have to place your subject slightly to the left or right of the frame.
Don’t just think higher
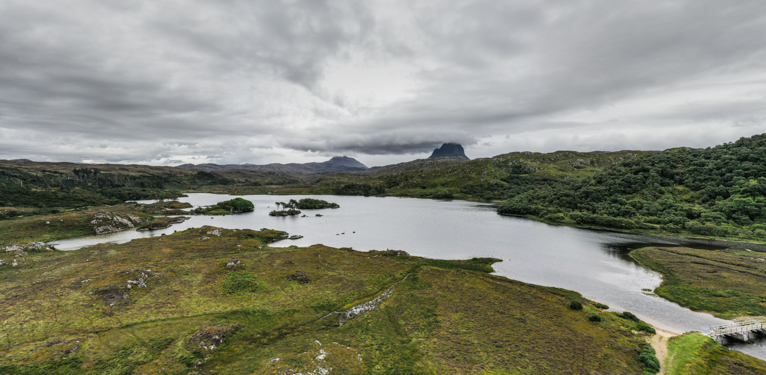
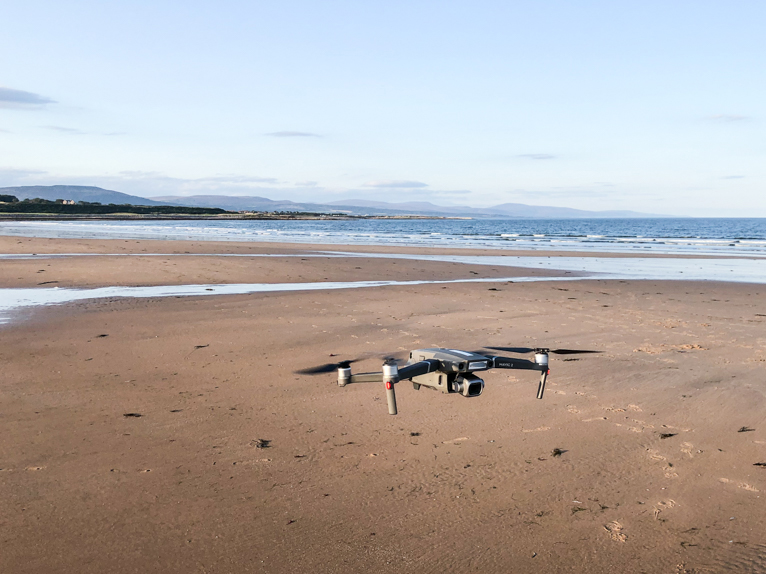
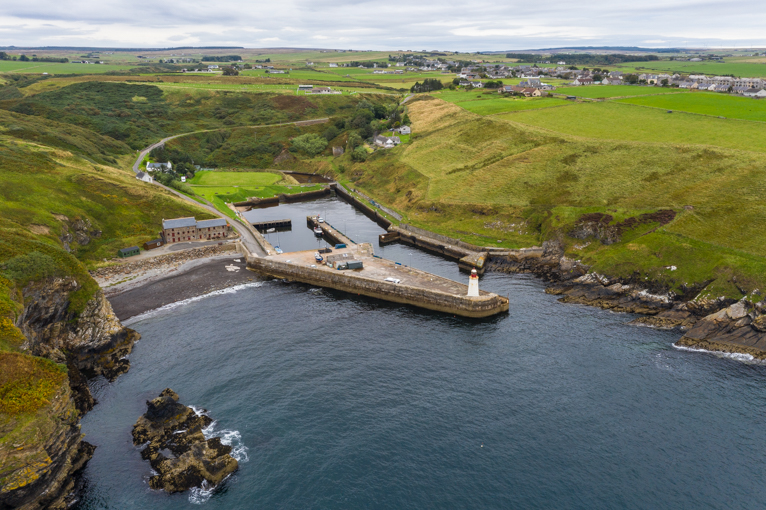
For me, one of the biggest advantages of having a drone is simply being able to get a slightly different angle of view than might be possible. That doesn’t necessarily mean that you have to take your drone high up. It could just be that you can swing your drone around to a place that wouldn’t be possible otherwise. For example, imagine you are photographing on a cliff. Using a drone will allow you to take photos from over the edge. Or for example, you might be photographing near water like a lake or the beach. Again a drone will allow you to take photos from over the water without getting yourself or your camera equipment wet. These might not need extra height but rather just a different angle. So don’t always think of your drone for height.
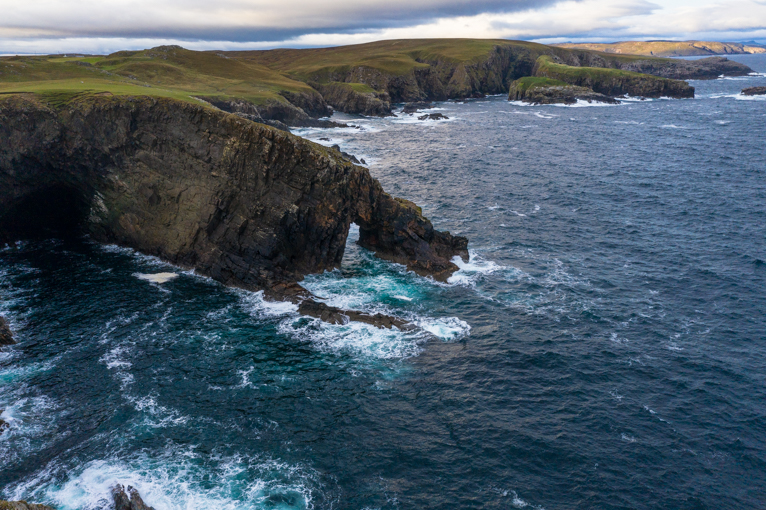
This photo is taken with the drone just over the edge of the cliff but at the same height as I was standing.
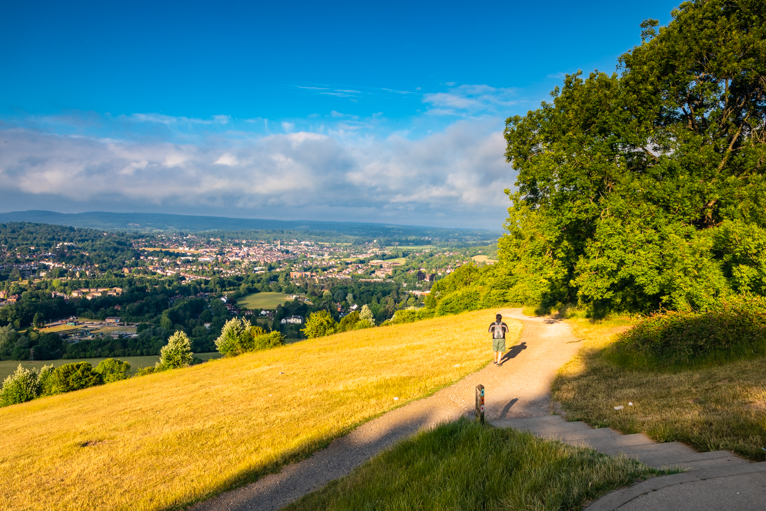
Put yourself in the shot
A drone can also be useful for those occasions when you want to put yourself in the photo. These types of photos can be really sellable as you are adding a point of interest to the shot. But you also benefit from having a model released photo (which is always far more valuable than an unreleased photo). You can, of course, do this with a normal DSLR camera but a drone does make it a lot easier as you don’t have to constantly move the camera around. So you can find your spot and move the drone while you are standing there for the perfect composition.
Drones are a fantastic tool for photographers. They open up a whole host of new shooting opportunities that were not possible previously. As long as you do your research and planning and have an understanding of the capabilities of your drone, you can end up with some truly stunning photos. Use these drone photography tips and you will be on your way to capturing great drone photos.
Photo credits: Kav Dadfar – All rights reserved. No usage without permission.
Latest articles by Kav Dadfar (see all articles)
- How To Photograph Street Performers - April 26, 2022
- Profiled Photographers – Ben McKechnie - August 24, 2021
- Profiled Photographers – Jim Maher - August 24, 2021
is the founding editor of JRNY Travel Magazine as well as a professional travel photographer and writer based in the UK. His images have been used by clients such as Condé Nast, National Geographic, Lonely Planet, Rough Guides and many others. Kav is also the co-founder of That Wild Idea, a company specializing in photography workshops and tours both in the UK and around the world.
See All Articles by Kav Dadfar


Leave a Reply