A brand new camera can be an exciting purchase. If it’s an upgrade it will mean better quality images and more advanced settings. But buying a new camera also might mean getting used to new dials and controls as well as the camera itself. Cameras are not all the same and some perform better than others in different scenarios and at different settings. The only way to be sure is to test out your camera before heading out on a shoot. So here are 3 quick tests that you can do when you buy a new camera to help you get the most out of it.
ISO test
ISO is one of the most useful tools when it comes to photography. It can be the difference between being able to capture a shot and not. But it also requires careful use as high ISO will mean noise which can ruin the sharpness of a photo. But that doesn’t mean you should never raise your ISO really high, you just need to be aware of the consequences. So this is a test that I always run on any new camera that I buy.
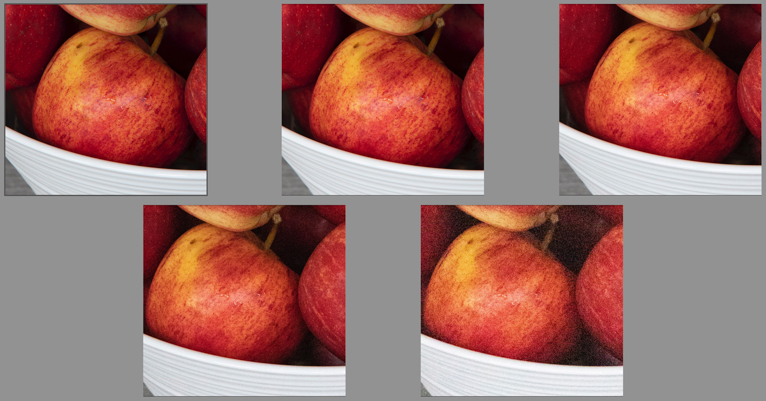
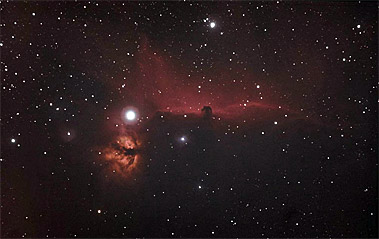
A set of images taken at different ISOs.
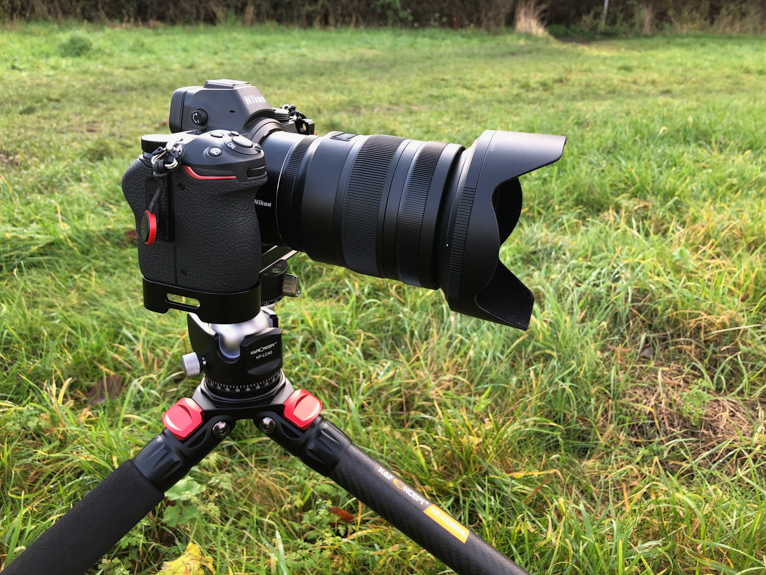
Simply set up your camera on a tripod at home to take a photo of an object. Ideally, pick somewhere which isn’t too bright otherwise you may not be able to set your shutter speed fast enough. Set your camera to manual focus and ensure that your object is correctly focused. Set your ISO to the lowest it can go in your camera and adjust the shutter speed accordingly. With your camera on a timer, take a photo. Then raise your ISO by a stop or two and take another (you may have to adjust your shutter speed). Keep going, raising your ISO each time until you get as high as your ISO allows.
Once you have your set of photos, open them up on your editing software and zoom in to full size. Look at each photo at different ISOs to see at what point the noise becomes too much and your image begins to look too soft. On some cameras, this might be at ISO 1000 whereas others will be fine ISO 3200. The only way to know for sure is to test out your camera. This will then ensure that when you are out in the field you have an understanding of the limitation of your camera and how high you can set your ISO.
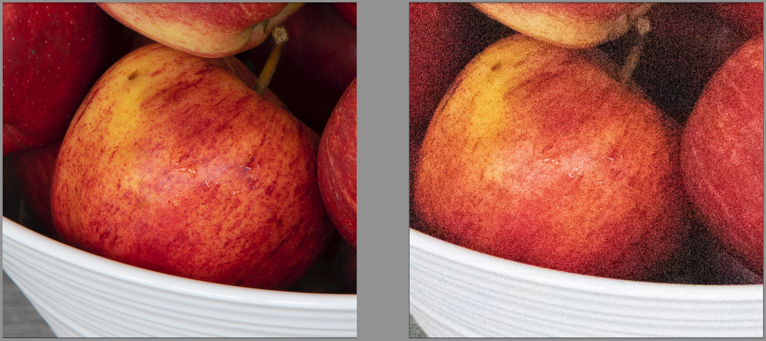
Left: image taken at ISO 100. Right: image was taken at ISO 102400. This shows the extremes of what high ISO can do to an image.
Image sharpness
Just like ISO, different cameras also produce different results when it comes to image sharpness at different shutter speeds. This is to do with in-camera image stabilization or lens image stabilization. But an additional factor that is often overlooked in this discussion is the weight of the camera. A heavier camera will naturally be more difficult to hold steady. When you combine this with image stabilization, you can begin to see why it’s important to test your camera before using it in a real-life scenario.
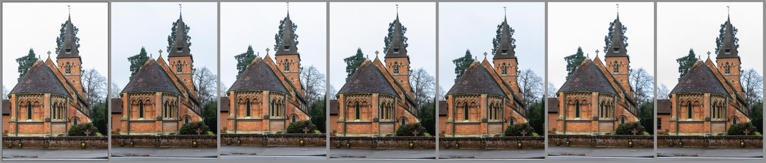
I always take a set of images like this with a new camera or lens to test its capabilities.
So for this test, you are going to use your camera and lenses at different shutter speeds to see how well it performs in capturing sharp images. Unlike the test above, you need to be outside for this one. Find something static like a building or statue (avoid trees and leaves that can be blown around in the wind), focus and then switch your camera to manual focus or lock your focus (you don’t want your focus point changing). Focus on the subject and look to set your shutter speed fast (i.e. 1/200 sec). Take a photo and then reduce the shutter speed and take another photo. Keep doing this until you get to a slow shutter speed.
You will have to play around with your aperture by making it smaller to be able to lower your shutter speed. Again, open your photo in your editing software and zoom in to check the image sharpness at different shutter speeds. You will then be able to get a good idea of what the capability of the camera is when it comes to different shutter speeds.
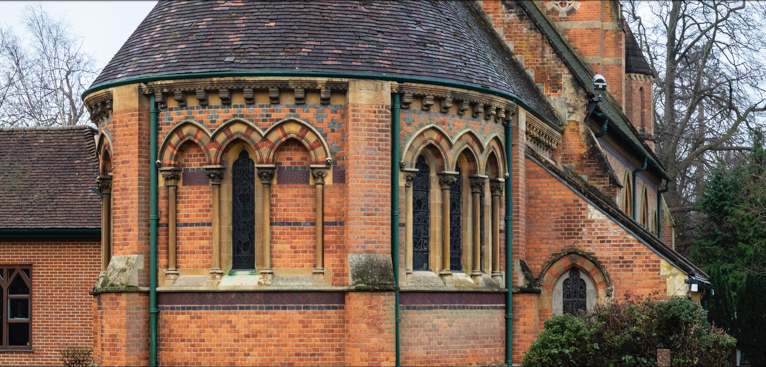
Shot at 1/200th sec. The image is sharp and in focus.
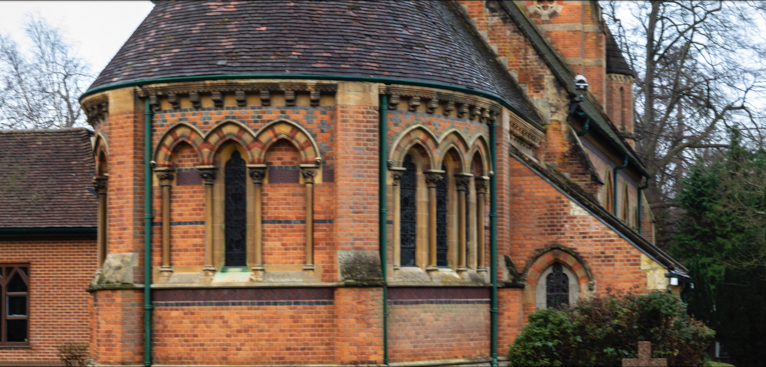
Shot at 1/8th sec. You can see that the edges are soft and not in focus.
Image Size
This test is about the actual image size that your camera produces. Why is this important you may ask? Because different cameras can produce different size files. This means that with bigger image sizes you will have more to play with in terms of cropping in post-production. For example, a full-frame sensor will produce a bigger image size as opposed to a crop sensor. So you will be able to crop an image taken with a full-frame camera more and it will still be big enough to print at larger sizes. Whereas with a smaller sensor camera you may have to rely more on actually zooming in or moving closer to your subject so that you are not cropping as much.
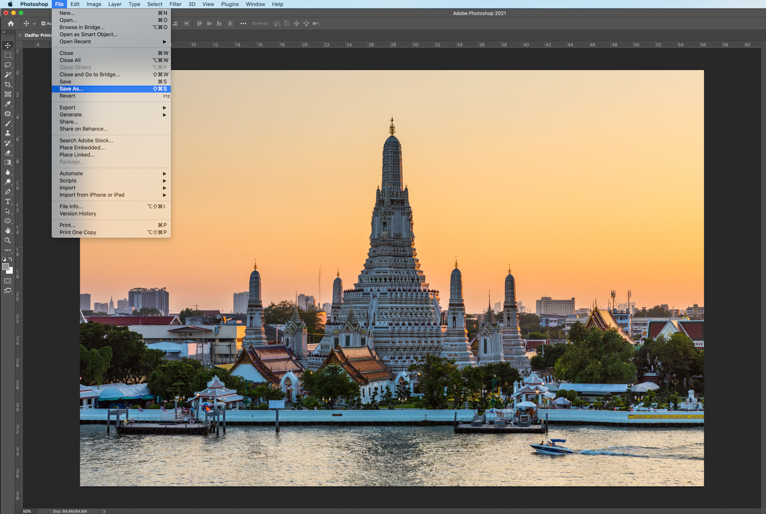
For this test, simply take a photo at the widest focal length of your lens. Try to do this on a bright day and outdoors and use a tripod if you can. Open the photo in your editing software and create several versions which are cropped to varying degrees. Export these as high res JPEG or TIFF files. Then open an A4 and A3 document in Photoshop and drop the different photos into the document. You may have to make the images bigger (or smaller) to fit the page. Zoom in to 100% view and check the image over. This will show you how much you are able to crop an image whilst still keeping its sharpness.
The reason for this test is that the more you stretch an image (i.e. make it bigger) the more resolution it will lose when viewed closely. This test will give you an idea of the cropping possibilities on your photos so that you can ensure you get them more accurate in-camera to avoid unnecessary cropping.
These 3 tests are pretty easy and quick to perform, but what you will learn from them will be invaluable when you are shooting for real. It will help you avoid those frustrating situations when you look at a photo and realise it’s not sharp. I do these 3 tests every time I buy a new camera which isn’t that often. So in reality you will only need to do this every few years.
Photo credits: Kav Dadfar – All rights reserved. No usage without permission.
Latest articles by Kav Dadfar (see all articles)
- How To Photograph Street Performers - April 26, 2022
- Profiled Photographers – Ben McKechnie - August 24, 2021
- Profiled Photographers – Jim Maher - August 24, 2021
is the founding editor of JRNY Travel Magazine as well as a professional travel photographer and writer based in the UK. His images have been used by clients such as Condé Nast, National Geographic, Lonely Planet, Rough Guides and many others. Kav is also the co-founder of That Wild Idea, a company specializing in photography workshops and tours both in the UK and around the world.
See All Articles by Kav Dadfar


Leave a Reply