• Cart
  • Checkout
  • My Account

Infrared Conversions, IR Modifications & Photography Tutorials | Life Pixel IR

The world leader in infrared conversions, modifications & DIY IR conversion tutorials. Scratched sensor replacement, UV & Full spectrum conversions.

The world leader in infrared camera conversions

866.610.1710
  • Home
  • → Start Here ←
    • 1 – Introduction
    • 2 – Filter Choices
    • 3 – Focus Calibration
    • 4 – Lens Considerations
    • 5 – Camera Considerations
    • 6 – Start Shopping
  • Galleries
    • Infrared Photography
    • Infrared Time Lapse
    • Infrared Cinematography
    • Infrared Stop Motion
    • Ultraviolet Photography
    • Forensic Photography
  • Education
    • Training Sessions
    • How To Shoot Infrared
    • AR Coated Infrared Filters
    • Lens Hot Spot Database
    • Photoshop Video Tutorials
    • Infrared Issues & Solutions
    • IR Basics in Photoshop
    • Camera Quick Start Guide
    • DIY Conversion Tutorials
    • IR Photography Primer
    • Secondhand Cameras
    • Wall Of Shame
  • Workshops
  • FAQ
  • Blog
    • Tutorials
    • Inspiration
    • Locations
    • Gear
    • News
    • Other
  • Why Choose LifePixel?
    • Submit Your Review
  • Contact
  • Shop

Make Your Infrared Portraits Look Better

Share
Pin
Tweet
Email
Share


example6a

Here’s a few steps to help improve your work

Portraits in Infrared can produce some stunning results but often need adjusting in post production.

Often a few short steps can make a big difference.

Today I’m going to show a series of quick steps to help improve your finished product.

The image I am working with was shot inside with a white background and a set of hot lights.

The camera was a Super Color converted Canon SL1, The lens a Canon 40mm f2.8 STM.  meta3

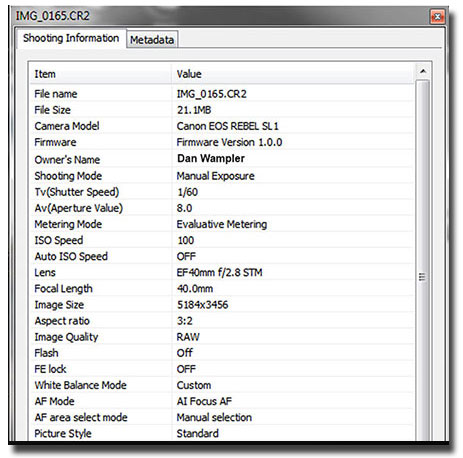
A White Balance was set using the white background as a reference image.

The fstop 8.0, the shutter speed was 1/60, the ISO 100.


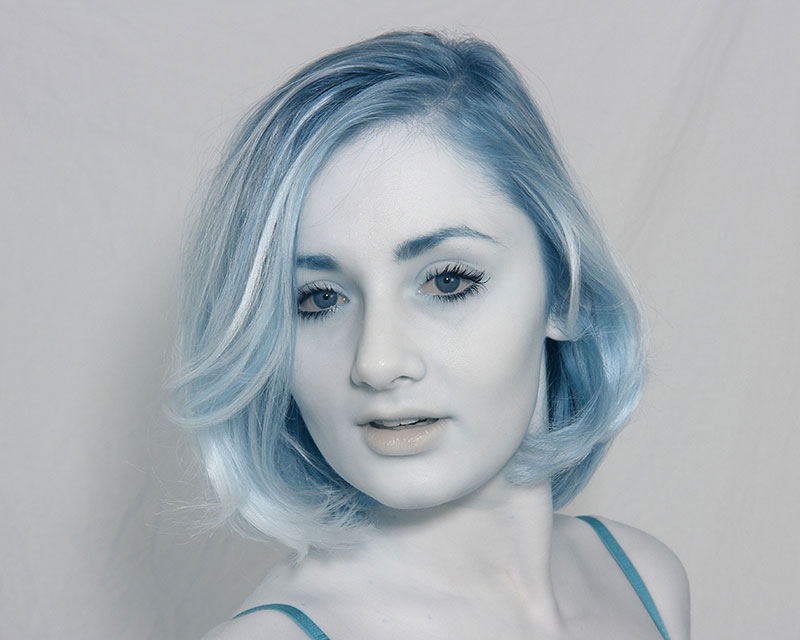
This is the RAW image file opened in Canon’s Digital Photo Professional.
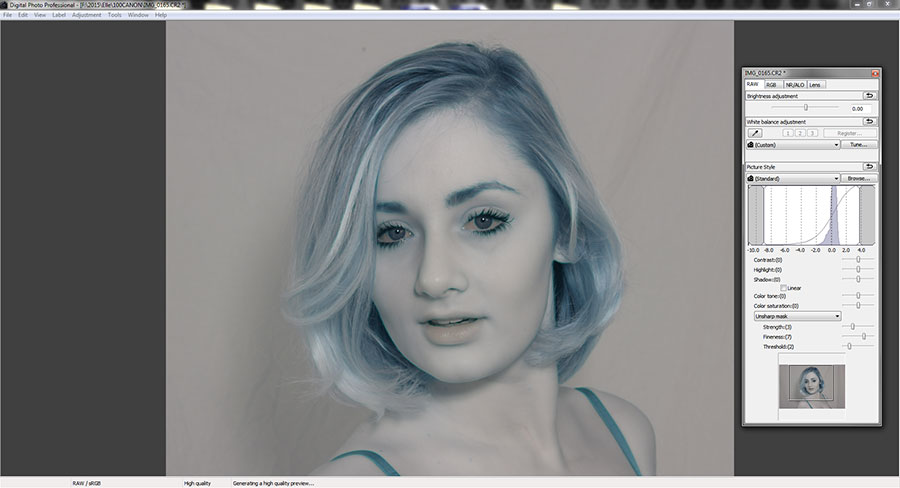
1


It needs some help.  dpp


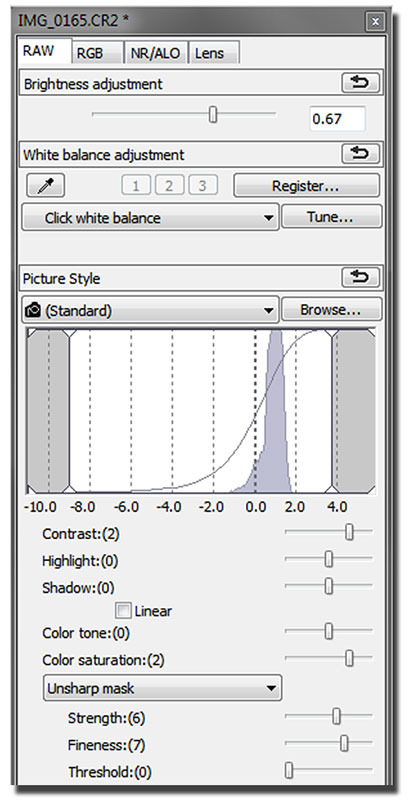
The first thing I did was a second White Balance using the the background as a reference,

then I adjusted the Brightness, contrast, highlights, shadows, color saturation, and sharpening.


Then I converted the image and opened it in Photoshop.

Win a FREE Camera Conversion!

example-a


It’s a little bit better, but needs more.

ps1


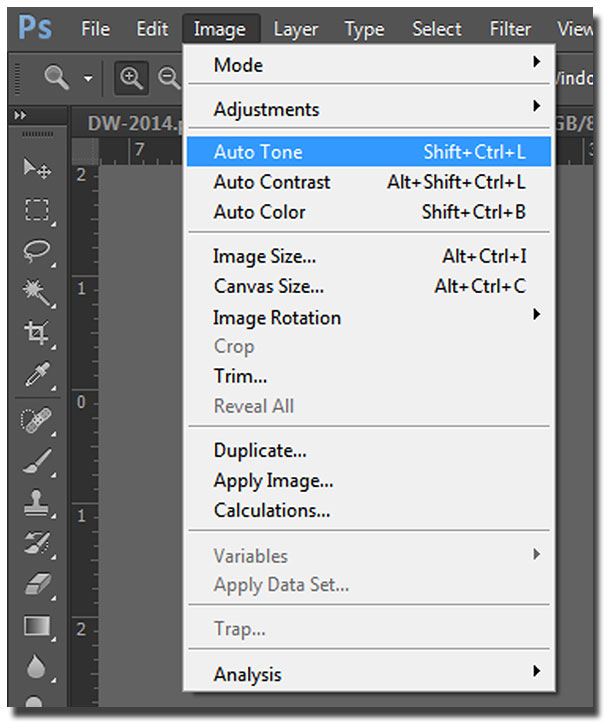
So, Since I want to process this quickly, I’m going to see what Photoshop can do with Auto Tones.

I clicked Image, Auto Tone.


And I got this.

example1

ps2a

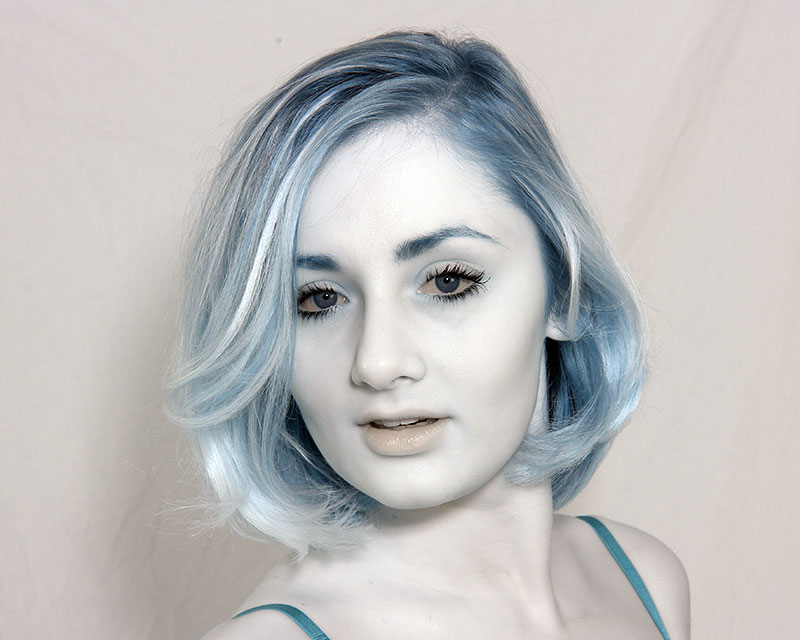
My lighting looks better, but Red color tones are distracting.


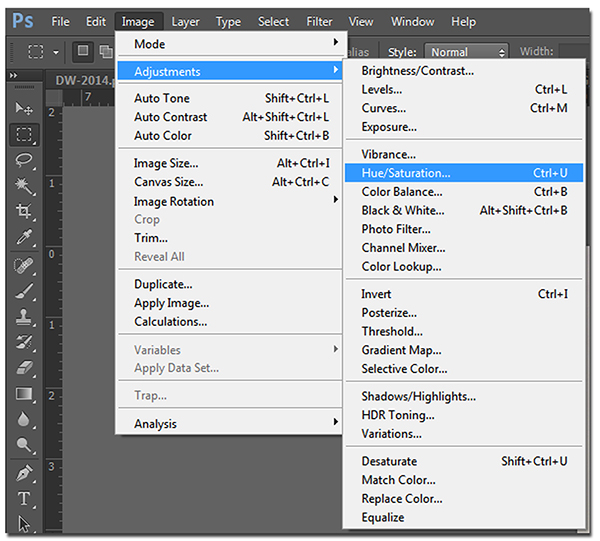
Let’s remove that Red tone.  I’ll click Image, Adjustments, Hue/Saturation.


ps3

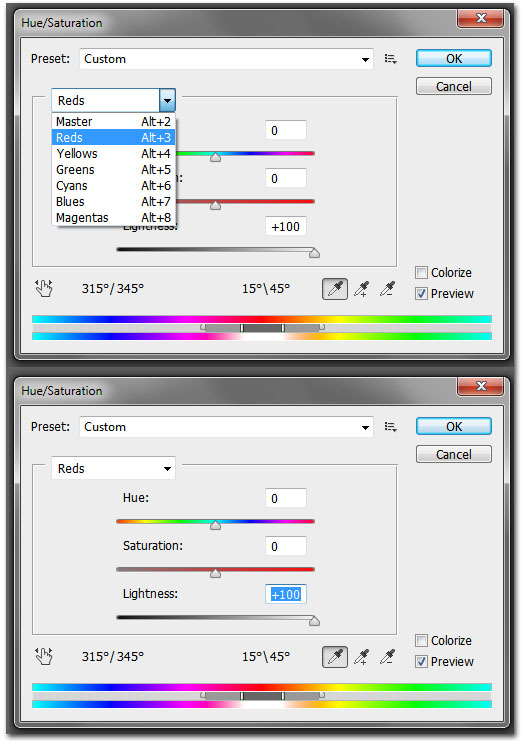
In Hue/Saturation, I’ll select RED from the drop box and then

Slide the Lightness bar all the way to the right.


With some images you may find other color tones that do not add to the image quality.  Often there can be Magenta, or even Green tones.  You can desaturate them this way.  First try adjusting the lightness.  If that does not look right to you, consider adjusting the Saturation level slider.


This also how to make the foliage white in an Infrared landscape image where you have color in your trees or grass.

Now, this is starting to look better.

example2

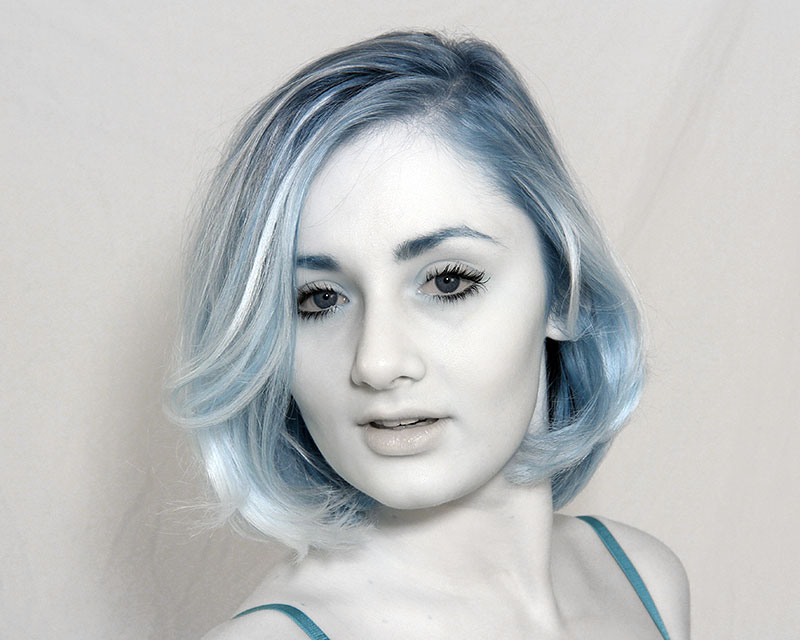
But, I want the eyes to pop more, really draw attention.


So, I am going to lighten just the eyes.

To do that I will want to use a layer mask.

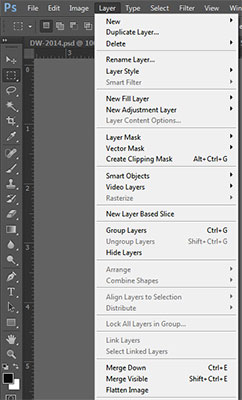
What I am going to do is create a duplicate copy of this image, adjust the eyes the way I want, and then using a layer mask, paint in what I want from that adjusted layer. It is not difficult once you learn the steps.   To create a new layer, click Layer, then Duplicate layer.

ps4


When the Duplicate Layer box comes up, rename the Layer Eye Adjustments


ps5


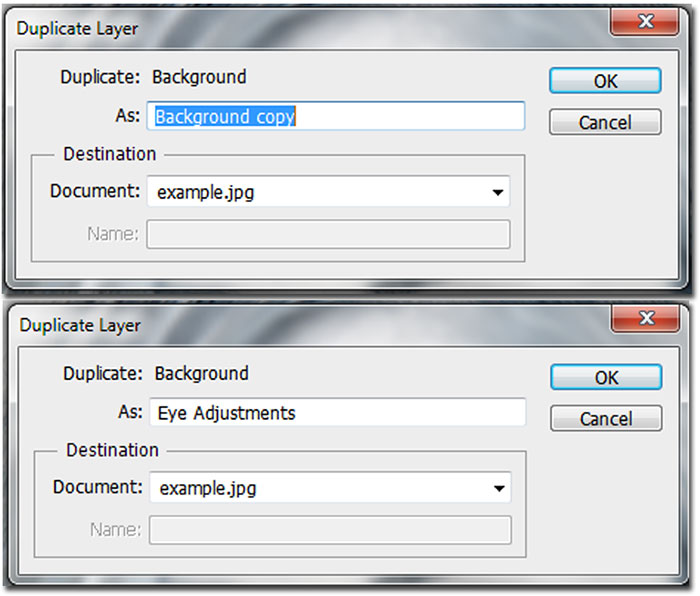
You will now see the Eye Adjustment layer in you list of layers.

ps6


Now I am going to adjust this layer, with my attention just on the eyes.

ps7


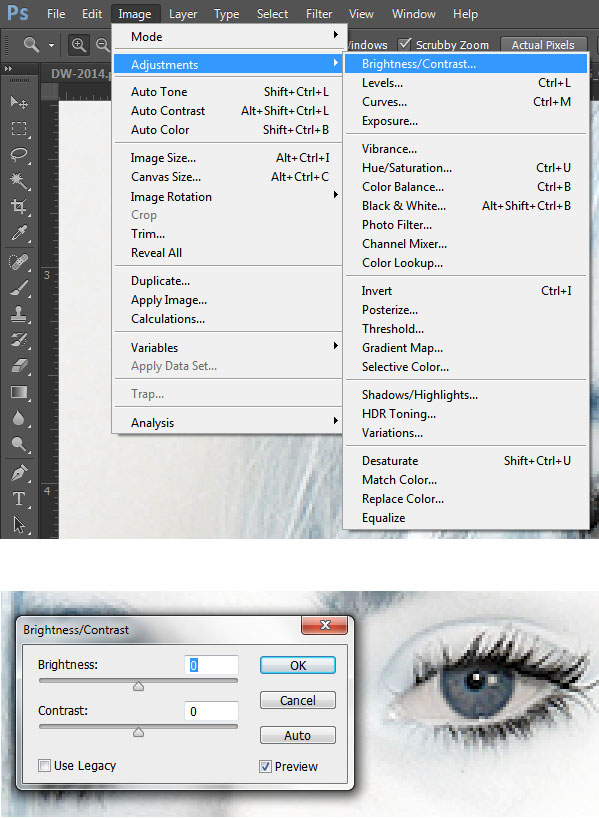
I’ll open Image, Adjustments, Brightness/Contrast


And adjust the sliders until I like the way the eyes look.


You can also adjust the color tone of the eyes by adjusting the Hue/Saturation levels.


I am not concerned with the rest of the image because I’m only going to use the eyes from this layer.

Now, I need a Layer Mask.


ps8a


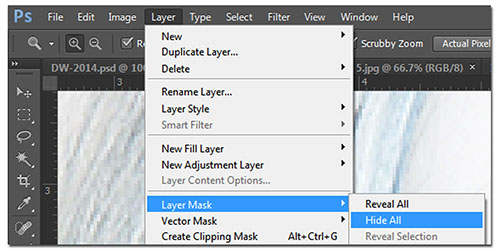
For a Layer Mask, click Layer, Layer Mask, Hide All


Now only what we want from the Eye Adjustment layer will show when we paint it into original image.

ps9


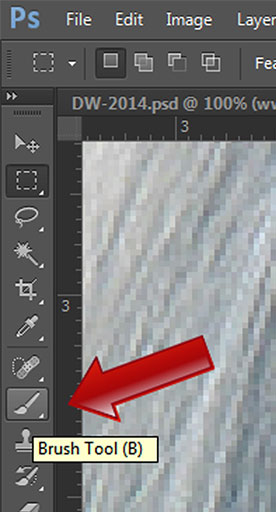
Next select the Brush tool.


ps10


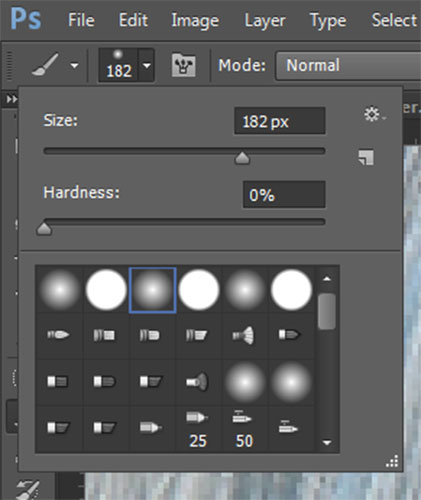
Then select brush size and hardness.


for something like this I would use a small brush with a soft edge.


Then carefully paint in the eyes.  If you make a mistake, and I often do, just grab the eraser tool and remove what you don’t want.


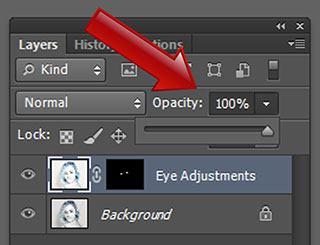
If the Eye Adjustment Layer Mask seems too intense, simply lessen it by lowering the the Opacity level.


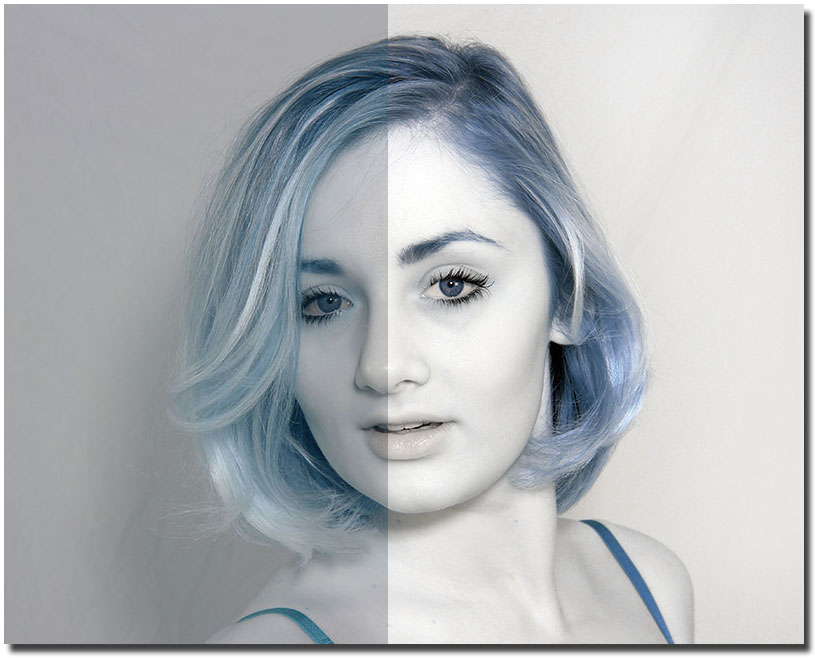
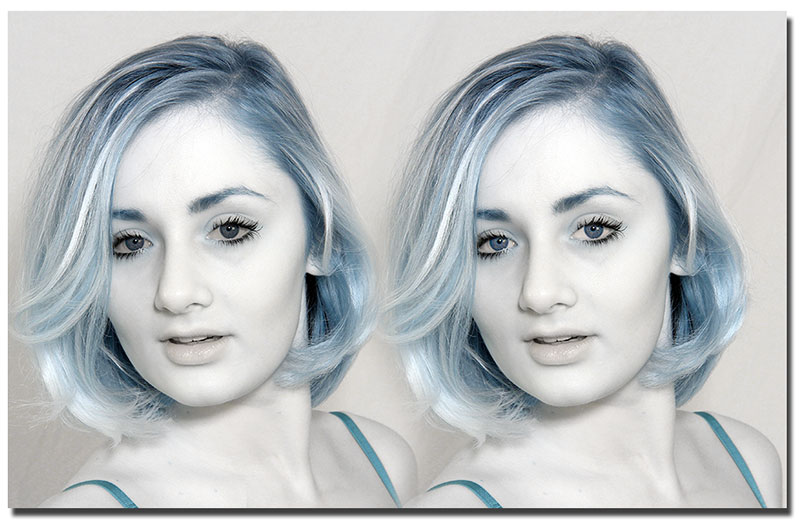
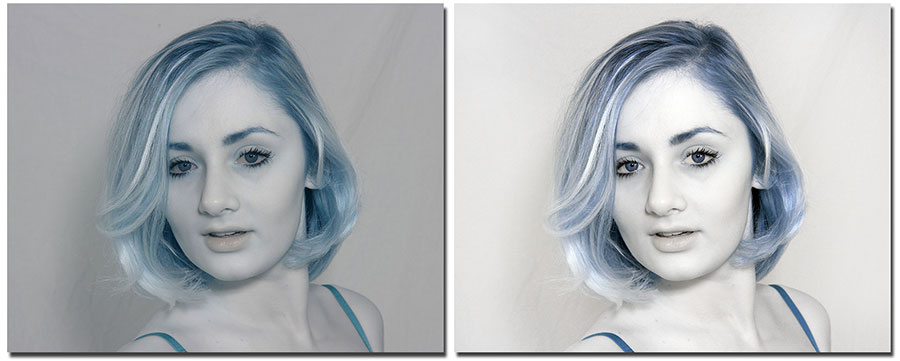
Here is the image, side by side.  The right image is with the Layer Mask

example3


ps14


It is at this point you will want to save the layered versions of this image as a Photoshop psd file.  Then click Layer, Merge Visible.


ps12


Now let’s adjust the colors in this image.


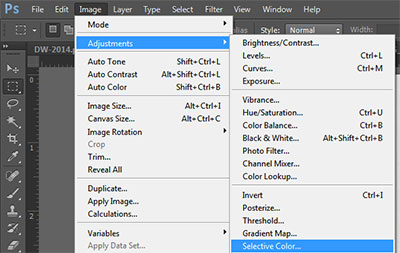
Click Image, Adjustments, Selective Color.


ps13


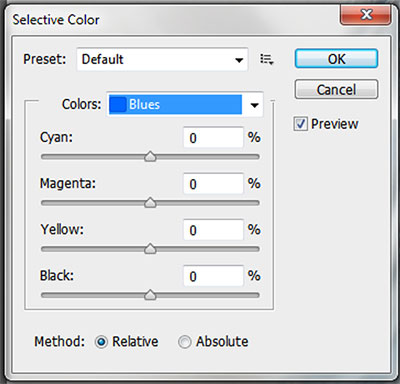
Then I am going to adjust the color tones with the color.


I have Blue and Cyan in this image, and I think I’ll adjust both a little.


Now let’s see, side by side, what we started and ended with.

example5

So, what do you think?  Once you learn the steps the process does not take very long.

  • Latest Articles
  • Author Bio
Dan Wampler

Latest articles by Dan Wampler (see all articles)

  • Seal Bay photoshoot - March 7, 2023
  • Major Copyright Infringement site Scroller.com - March 6, 2023
  • Kangaroo Island Wallabies and Roos - March 1, 2023
Dan Wampler

Dan Wampler

Dan Wampler is a digital artist from St Louis, MO. Having been interested in art and photography since childhood, he spent most of adult life working for Kodak and in the portrait photography industry. A student of the works of Ansel Adams, Any Warhol, and David Hamilton, Dan attempted to keep a wide range of artistic style.

As an early adopter of digital imaging, he found it gave him a way to completely incorporate art and photography. Began shooting Digital Infrared in 2004, and had first camera converted in 2006. His work has been seen in numerous gallery shows, is featured in an iTunes app. He produces Infrared and natural color digital art for sale and teaches his post-production techniques online.

Dan is LifePixel's Creative Director,  social media manager, lead blog author, main workshops and training sessions instructor. His images appear in this gallery and throughout the website.

If you have a topic suggestion or request feel free to shoot him an email at danwampler@lifepixel.com

Otherwise all LifePixel customer service inquires should be directed to service@lifepixel.com or by phone at 866-610-1710.

View more of Dan's work on his Website | Facebook


See All Articles by Dan Wampler
Share
Pin
Tweet
Email
Share
Share
Pin
Tweet
Email
Share

Related Posts

  • Infrared Photoshop Tutorials & Videos
    Infrared Photoshop Tutorials & Videos
  • Basic Infrared Photoshop Techniques Tutorial
    Basic Infrared Photoshop Techniques Tutorial
  • Life Pixel Modified Camera Quick Start Guide
    Life Pixel Modified Camera Quick Start Guide
  • The Wall Of Shame
    The Wall Of Shame

Filed Under: Tutorials

Comments

  1. Mark G says

    September 13, 2017 at 12:31 pm

    I love that a Google search brought me to one of your tutorials. Learned a few things here that may help my portrait work – thank you!

    Reply
  2. Don hatfield says

    February 18, 2016 at 5:57 pm

    What results can be achieved with an IR-only (not super color, etc) converted camera?

    Reply
    • Dan Wampler says

      February 18, 2016 at 6:38 pm

      Hi Don, If you are asking about monochrome Infrared, you can also get similar effects minus the color. Super Color images are Infrared though, just for the record.

      Reply
  3. Darryl Murphy says

    January 21, 2016 at 1:57 am

    Awesome! I’ve never been happy with IR portraiture…. This explains why. Thank you.

    Reply
  4. Udayan says

    January 20, 2016 at 12:32 am

    Fantastic work flow !!! Very informative !!! you rock Dan !!!

    Reply
  5. Tim ONeill says

    December 29, 2015 at 10:11 pm

    Excellent work and examples as usual Dan. More please.

    Reply
  6. Tim says

    December 29, 2015 at 3:23 pm

    Dan, thanks for the tutorial. Some of the things I never figured out how to do in PS, but were very helpful, esp the idea of the ‘second’ white balance as well as some of the other adjustments.

    Reply
  7. Tony Morrison says

    December 29, 2015 at 1:49 pm

    Very helpful, I have a camera that has been converted to 720 nm, really like what you can do with the super color.

    Reply
  8. Jeff Geiger says

    December 29, 2015 at 1:19 pm

    Dan,
    Thanks for the information. Very helpful.

    Reply

Leave a Reply Cancel reply

Your email address will not be published. Required fields are marked *

Blog Topics

  • Tutorials
  • Inspiration
  • Locations
  • Gear
  • News
  • Other/Misc

What our customers say:

Life Pixel has been a life-changer for me. Continue reading
Eric GConnecticut
Read more reviews
I am more than satisfied with the service I received Continue reading
Christopher JCanada
Read more reviews
I am more than pleased with the conversion job that you did Continue reading
LOUIS MWaco, Texas
Read more reviews
I am VERY impressed with his knowledge of your products and his patience in explaining it to a novice like me. Continue reading
Lynn FEssex, Maryland
Read more reviews
Things will only get better from here thanks to all of you. Continue reading
Phillip FRedding, California
Read more reviews
The Lifepixel newsletter reminds me of not having expressed my gratitude for the excellent job you made. Continue reading
Michael GGermany
Read more reviews
Your staff went above and beyond the call of duty to make sure everything was handled in an excellent manner. Continue reading
Paige RPearland, Texas
Read more reviews
It has given my old camera a new life, I will enjoy using it again. Continue reading
William PAustralia
Read more reviews
Excellent service and the camera works just great Continue reading
Hans FairhurstAustralia
Read more reviews
I just got my converted camera back from you guys. THANK YOU!!!! Continue reading
Anne CutlerForest Knolls, CA
Read more reviews
infrared_filter_choices_sidebar
ir_conversions_explained_sidebar
----------- Watch More Videos -----------
infrared_quick_start_guide

Ready to start shooting Infrared?

Convert My Camera

Subscribe To Our Newsletter

Receive updates, tips, cool tutorials, free stuff and special discounts.

Learn the Basics

  • Video
  • Start Here
  • Filter Choices
  • Focus Calibration
  • Lens Considerations
  • Camera Considerations
  • Place Your Conversion Order

Resources

  • Galleries
  • Lens Hot Spot Database
  • IR Tutorials
  • FAQ
  • Infrared Filter Choices
  • Infrared Photography Guide
  • Infrared DIY Tutorials

Company

  • Why Choose Us
  • Get In Contact
  • Job Openings
  • Write For Us
  • Affiliate Program
  • Terms of Use
  • Privacy Policy
  • Home
  • Start Here
  • Galleries
  • Tutorials
  • FAQ
  • Blog
  • Why Choose LifePixel?
  • Shop
  • Contact

Copyright © 2025 Life Pixel Infrared - All rights reserved - LifePixel Infrared Photography IR Conversion, Modification & Scratched Sensor Repair