• Cart
  • Checkout
  • My Account

Infrared Conversions, IR Modifications & Photography Tutorials | Life Pixel IR

The world leader in infrared conversions, modifications & DIY IR conversion tutorials. Scratched sensor replacement, UV & Full spectrum conversions.

The world leader in infrared camera conversions

866.610.1710
  • Home
  • → Start Here ←
    • 1 – Introduction
    • 2 – Filter Choices
    • 3 – Focus Calibration
    • 4 – Lens Considerations
    • 5 – Camera Considerations
    • 6 – Start Shopping
  • Galleries
    • Infrared Photography
    • Infrared Time Lapse
    • Infrared Cinematography
    • Infrared Stop Motion
    • Ultraviolet Photography
    • Forensic Photography
  • Education
    • Training Sessions
    • How To Shoot Infrared
    • AR Coated Infrared Filters
    • Lens Hot Spot Database
    • Photoshop Video Tutorials
    • Infrared Issues & Solutions
    • IR Basics in Photoshop
    • Camera Quick Start Guide
    • DIY Conversion Tutorials
    • IR Photography Primer
    • Secondhand Cameras
    • Wall Of Shame
  • Workshops
  • FAQ
  • Blog
    • Tutorials
    • Inspiration
    • Locations
    • Gear
    • News
    • Other
  • Why Choose LifePixel?
    • Submit Your Review
  • Contact
  • Shop

DIY Installation Guide For Frameless Filters

Share
Pin
Tweet
Email
Share

For some camera models our DIY filters are supplied to fit the OEM filter mounting frames and for other camera models they are supplied in a different size and/or thickness, which will require the frameless installation method as outlined below.

If the DIY filter for your camera model is supplied with a self-adhesive filter mounting frame for a frameless installation, please follow the instructions below to complete your DIY conversion filter installation.

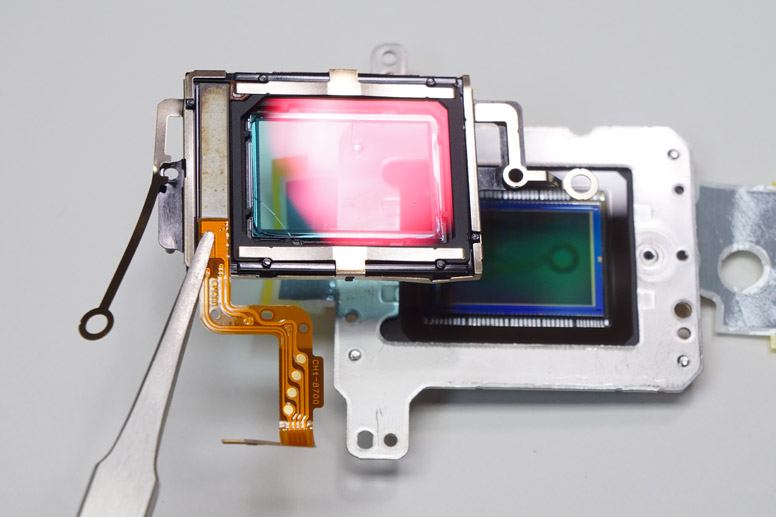
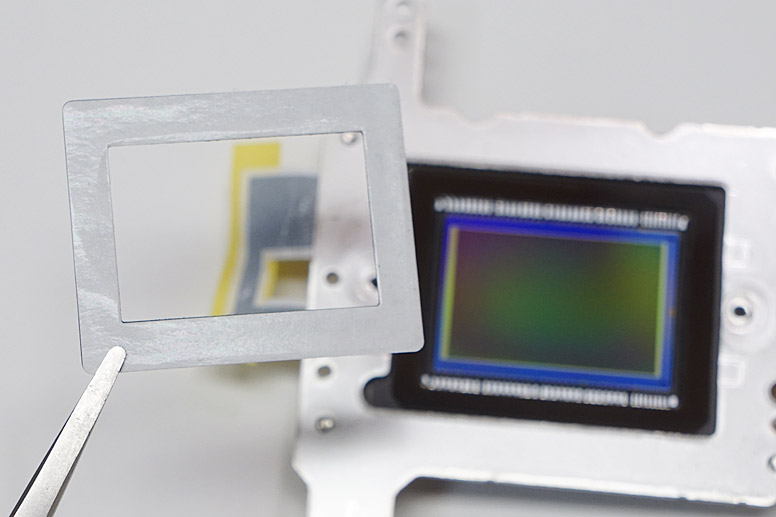
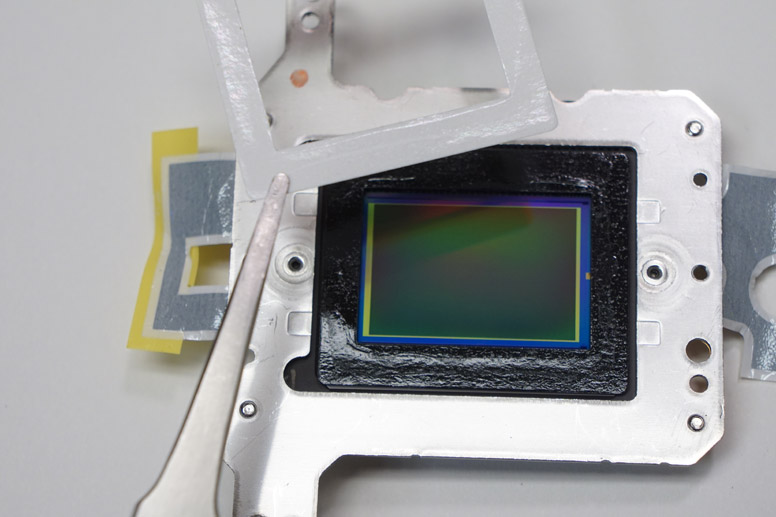
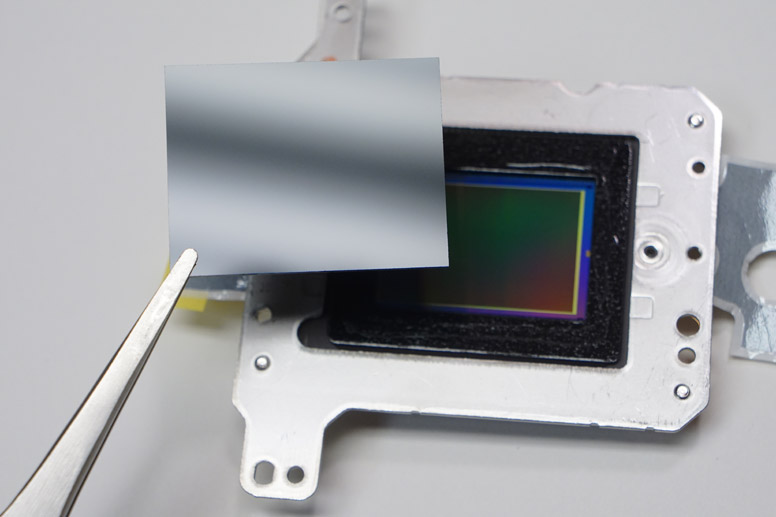
Note: The photographs are for general illustration purposes only and are not for your specific camera model.

Step 1 – If you haven’t done so already, remove all OEM filter mounting components until you are left with the bare sensor surface.

DIY-Installation-Guide-For-Frameless-Filters-a

Step 2 – While working in a clean air environment prepare the bare sensor surface to be free of any remaining adhesives, streaks, dust, etc.

We recommend Eclipse Fluid and Pec-Pads for the cleaning steps in this tutorial, but feel free to use whatever method you are familiar with that works well for you.

Step 3 – Carefully, with the help of tweezers, remove the liner from one side of the supplied self-adhesive filter frame. Remove any lint particles that may have become attached to the frame and are facing into the inner opening.

Now gently apply the filter frame onto the sensor. Do this carefully and deliberately, making sure to have good alignment between the imaging part of the sensor and the frame opening as to not obstruct any part of the image with the filter frame.

DIY-Installation-Guide-For-Frameless-Filters-b

Step 4 – Remove the liner from the second surface of the filter frame, be careful not to touch and scratch the sensor imaging area or introduce any dust, lint or debris.

DIY-Installation-Guide-For-Frameless-Filters-c

Step 5 – Keep the sensor under clean air while you prepare one side of the DIY filter to be free of any streaks, dust particles, etc. Once you are certain that your DIY filter surface is pristinely clean and the sensor is still clean as well, affix the prepared clean side of the DIY filter onto the second surface of the self-adhesive filter frame. Be sure to align the DIY filter well so it is well centered relative to the self-adhesive filter frame.

The filter frame adhesive is pressure sensitive, so only apply pressure after you are certain of good alignment, ensuring a secure, airtight and dust free seal between the sensor and filter mating surfaces. Do not press on the center of the filter, just around the sides directly over the filter frame. The goal here is to create a strong bond between all mating surfaces.

DIY-Installation-Guide-For-Frameless-Filters-d

Step 6 – Still keeping the now completed sensor/filter assembly under clean air, prepare the outer filter surface to be completely clean and dust free. Once confirmed clean, begin reassembly by positioning the sensor assembly into the camera body.

Now follow your camera’s DIY conversion tutorial from this point in reverse to reassemble the camera.

Note: The self-adhesive filter frames are designed for one time use only. If upon reassembly you realize that you have dust specs trapped inside the filter/sensor stack and have to redo the process, be aware that the adhesion will not be as strong as with first use. We recommend using a new filter frame each time you must redo the process.

Also, full bond strength will not be attained for a day or two so if you must redo, then do so soon after application while the bond is fresh and relatively weak. If you wait, you may have a harder time separating the stack without causing damage to the filter, sensor or filter frame.

Applying some gentle heat with a heat gun to warm the filter frame adhesive may help ease separation.


Share
Pin
Tweet
Email
Share

Blog Topics

  • Tutorials
  • Inspiration
  • Locations
  • Gear
  • News
  • Other/Misc

What our customers say:

Life Pixel has been a life-changer for me. Continue reading
Eric GConnecticut
Read more reviews
I am more than satisfied with the service I received Continue reading
Christopher JCanada
Read more reviews
I am more than pleased with the conversion job that you did Continue reading
LOUIS MWaco, Texas
Read more reviews
I am VERY impressed with his knowledge of your products and his patience in explaining it to a novice like me. Continue reading
Lynn FEssex, Maryland
Read more reviews
Things will only get better from here thanks to all of you. Continue reading
Phillip FRedding, California
Read more reviews
The Lifepixel newsletter reminds me of not having expressed my gratitude for the excellent job you made. Continue reading
Michael GGermany
Read more reviews
Your staff went above and beyond the call of duty to make sure everything was handled in an excellent manner. Continue reading
Paige RPearland, Texas
Read more reviews
It has given my old camera a new life, I will enjoy using it again. Continue reading
William PAustralia
Read more reviews
Excellent service and the camera works just great Continue reading
Hans FairhurstAustralia
Read more reviews
I just got my converted camera back from you guys. THANK YOU!!!! Continue reading
Anne CutlerForest Knolls, CA
Read more reviews
infrared_filter_choices_sidebar
ir_conversions_explained_sidebar
----------- Watch More Videos -----------
infrared_quick_start_guide

Ready to start shooting Infrared?

Convert My Camera

Subscribe To Our Newsletter

Receive updates, tips, cool tutorials, free stuff and special discounts.

Learn the Basics

  • Video
  • Start Here
  • Filter Choices
  • Focus Calibration
  • Lens Considerations
  • Camera Considerations
  • Place Your Conversion Order

Resources

  • Galleries
  • Lens Hot Spot Database
  • IR Tutorials
  • FAQ
  • Infrared Filter Choices
  • Infrared Photography Guide
  • Infrared DIY Tutorials

Company

  • Why Choose Us
  • Get In Contact
  • Job Openings
  • Write For Us
  • Affiliate Program
  • Terms of Use
  • Privacy Policy
  • Home
  • Start Here
  • Galleries
  • Tutorials
  • FAQ
  • Blog
  • Why Choose LifePixel?
  • Shop
  • Contact

Copyright © 2025 Life Pixel Infrared - All rights reserved - LifePixel Infrared Photography IR Conversion, Modification & Scratched Sensor Repair