As much as I enjoy making photographs when I’m out on one of my adventures, I look forward to spending time in front of my computer processing them. It’s a great deal of fun to use the various tools I have at my disposal to try and tease out the details that made an impression on me.
Over the years I’ve been a professional photographer, I’ve been developing the capacity to know how I want to process an image even before I bring my camera up to my eye to capture a scene. Sometimes it takes a certain amount of time spent processing the image until it becomes clear what the image is about to me. But as I said before, there are more and more moments where I will come upon a scene and know instantly what I want the final processed image to look like. In both these scenarios, the camera is just a tool. It allows me to capture all the digital information necessary to help me create my masterpiece.
What I’d like to do now, is share a few images and talk about my thought process in taking the original raw data and transforming it into the final version that I share with the world.
PHOTO #1
original and unprocessed
There were two main things that struck me about this scene as I was ski touring up on Hudson Bay Mountain:
- the s-shape from the peak of the mountain down to the bottom of the crater
- the detail on the surface of the snow as it was lit by the late afternoon sun
Because these details, it was obvious that the scene was more about form than anything else. The color didn’t contribute anything to making this something I wanted to photograph. So I took it into Lightroom and then did the bulk of the processing with Silver Efex Pro. Essentially I added a bit more highlights and deepened the shadows to accentuate the contrasting tones from the peak of the mountain to the bottom of the crater. Then I added some structure to the highlights and brought it back into Lightroom where I applied some cropping to finish it off.
final version
PHOTO #2
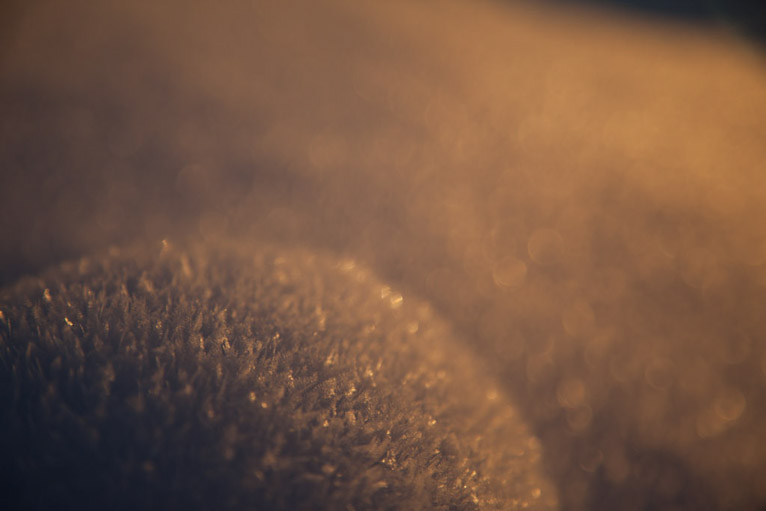
original and unprocessed
One of the joys of getting up early is being on the mountain before daylight. Watching the snow change color as the sun rises is a magical experience. On the morning I made this image it was quite cold and so the hoar frost was plentiful. I always enjoy it when this happens as it highlights the beauty in the tiny snowflakes. I used a narrow depth of field for this photograph and processed it in such a way that it brought the fragility of the snowflakes while accentuating the gorgeous color that was on display. I cropped it a bit to eliminate the distracting shadow in the upper right corner of the frame.
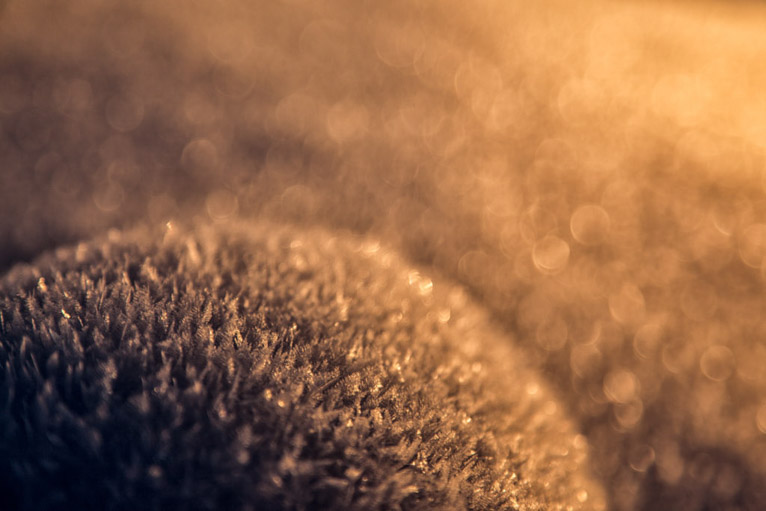
final version
PHOTO #3
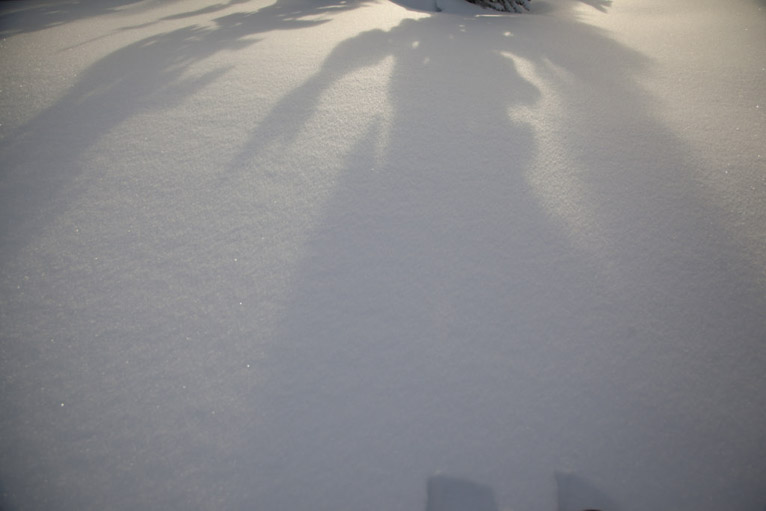
original and unprocessed
I remember when I started as a photographer I didn’t understand the importance of a shadow to the extent I do now. At first glance, a shadow is merely an indicator of an object between your eyes and a light source. I now am much more appreciative of it’s other qualities. In this instance the shadows of the trees give shape to the snow and add an element of depth to the image. Everything I did in processing was to highlight the gentle curve in the snow that lay before me. Adjusting the black and white levels and adding a little detail to the surface of the snow were the main things I did. Lastly I cropped it to remove the distracting elements in the upper right and left corners and the ski tracks at the bottom of the frame.
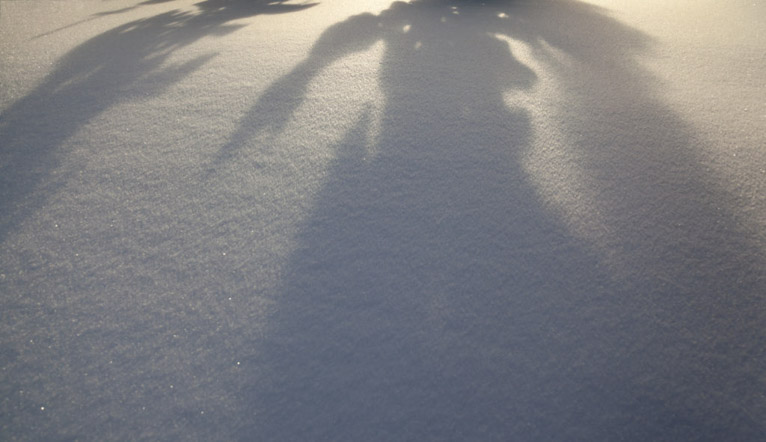
final version
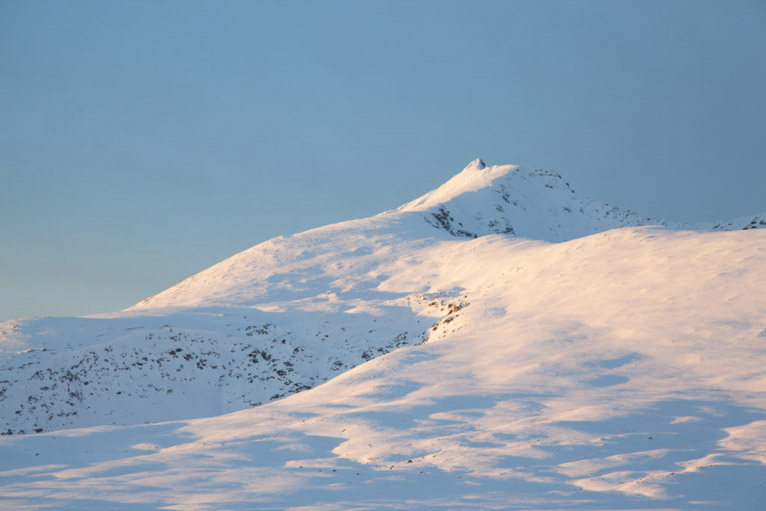
PHOTO #4
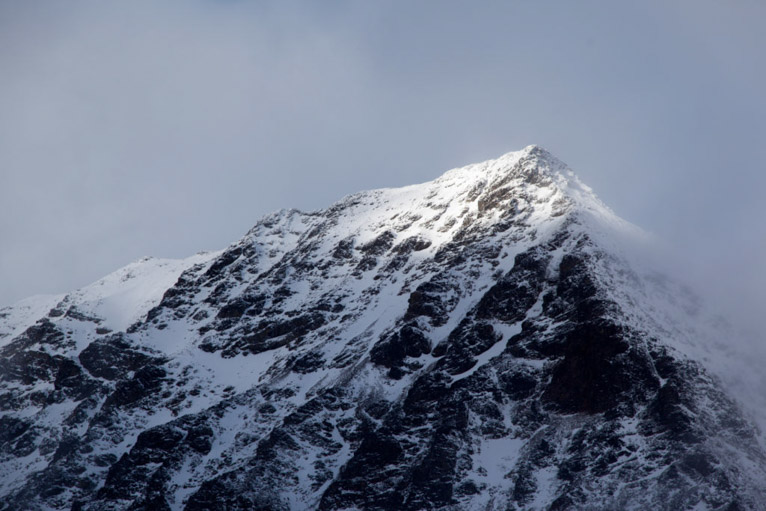
original and unprocessed
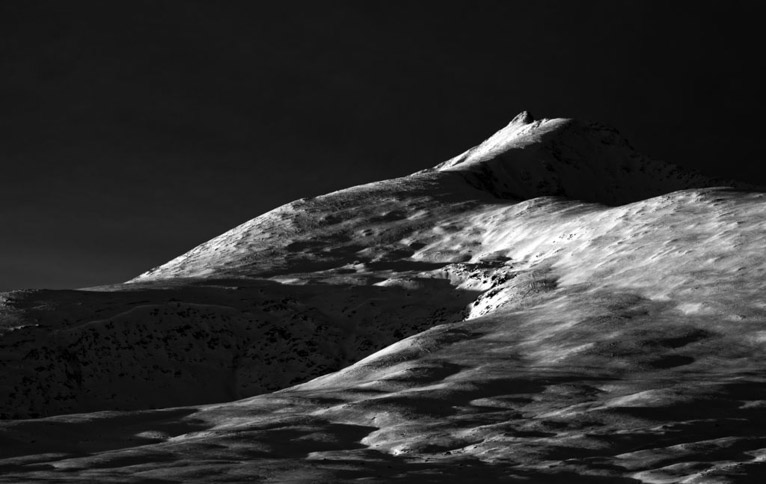
The ruggedness of a mountain is always inspiring. Whenever I have the opportunity, I enjoy touring up a little higher on Hudson Bay Mountain than I typically do. This image was made late in October at 2:30 in the afternoon and with the little cloud cover that was in the sky, it gave me the impression that the tip of the mountain was peaking out from underneath a blanket. So when I processed the image, I converted it to black and white, and proceeded to add a graduated filter to the bottom half of the image to gradually increase the blacks. I added some highlights and as I typically do with this kind of image, increased the clarity in the visible part of the image.
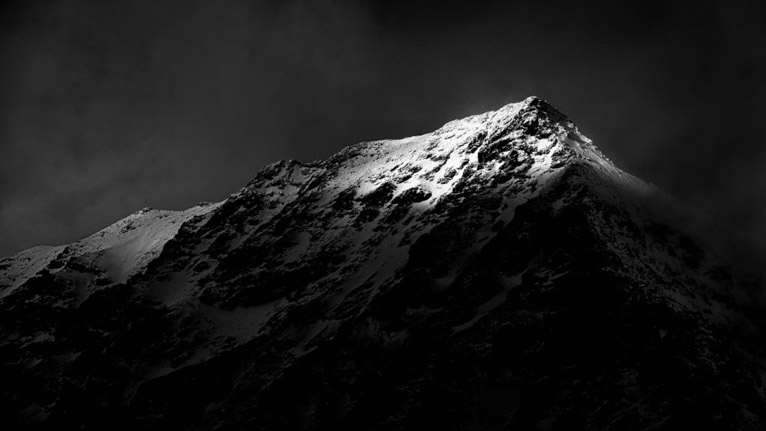
final version
Conclusion
Are my photographs believable or are they realistic? I’m of the school of thought that ascribes to the former. Everything that I do with my camera and with the software to process my photographs, is designed to recreate what I see in my minds eye when I come upon a scene I want to photograph. I try and convey a sense of wonder and appreciation for the beauty of nature. I try and ignite the senses of whoever views my photography and make them imagine that they were right there with me when I was out on an adventure.
So the question that remains is this: what do you see when you look at the world?
I’d love to hear from you with your thoughts. So why don’t you leave a comment below and let’s begin a dialogue about vision and how we use our cameras to share what we see.
Latest articles by Curtis Cunningham (see all articles)
- Fatigue and Photography - April 24, 2017
- Before and After - April 1, 2017
- Artistic Abstractions - February 20, 2017
Curtis Cunningham
Curtis Cunningham is a freelance photographer in Smithers, BC. He's passionate about seeking out the splendor of this earth, from the smallest snowflake to the grandest mountaintop vista. He absolutely loves telling the story of wherever he is, no matter what he's doing through his photography and writing.
See All Articles by Curtis Cunningham


Leave a Reply