Now a days when the subject of HDR comes up, most people fall into two categories; those who like it and think it’s interesting, and those who hate it with every fiber of their being. Now I admit there are more than a few HDR images I’ve seen that are . . . hard to look at. I have more than once “over cooked” an HDR image myself. This piece though is aimed at people who like HDR; sorry haters, maybe next time. For the uninitiated, HDR, (High Dynamic Range) is an image created by the blending of multiple exposures of an image. When done properly, the finished product can produce exciting results.
The process for creating Infrared HDR is similar in many ways to creating natural color HDR images, however there some differences. Let’s go thru the steps from the start.
Capture Bracketed Images
Most cameras have the ability to shoot brackets of images, usually in sets of 3, 5, or 7 exposures. Often it is called AEB (auto exposure bracketing). This allows you to push the button and capture multiple exposures. The brackets you select to capture is your decision, but an easy rule of thumb I use is:
3 exposures – set 1 stop over and under each way.
5 or 7 exposures – set 1/3 to 1/4 stop each way.
Another thing to consider is the length of your longest exposure. If you are shooting your brackets hand held, make certain you can hold the camera steady for every exposure. Most people can keep a camera steady down to 1/60th of a second. Below that the images start to get blurry. That leads us to the next point.
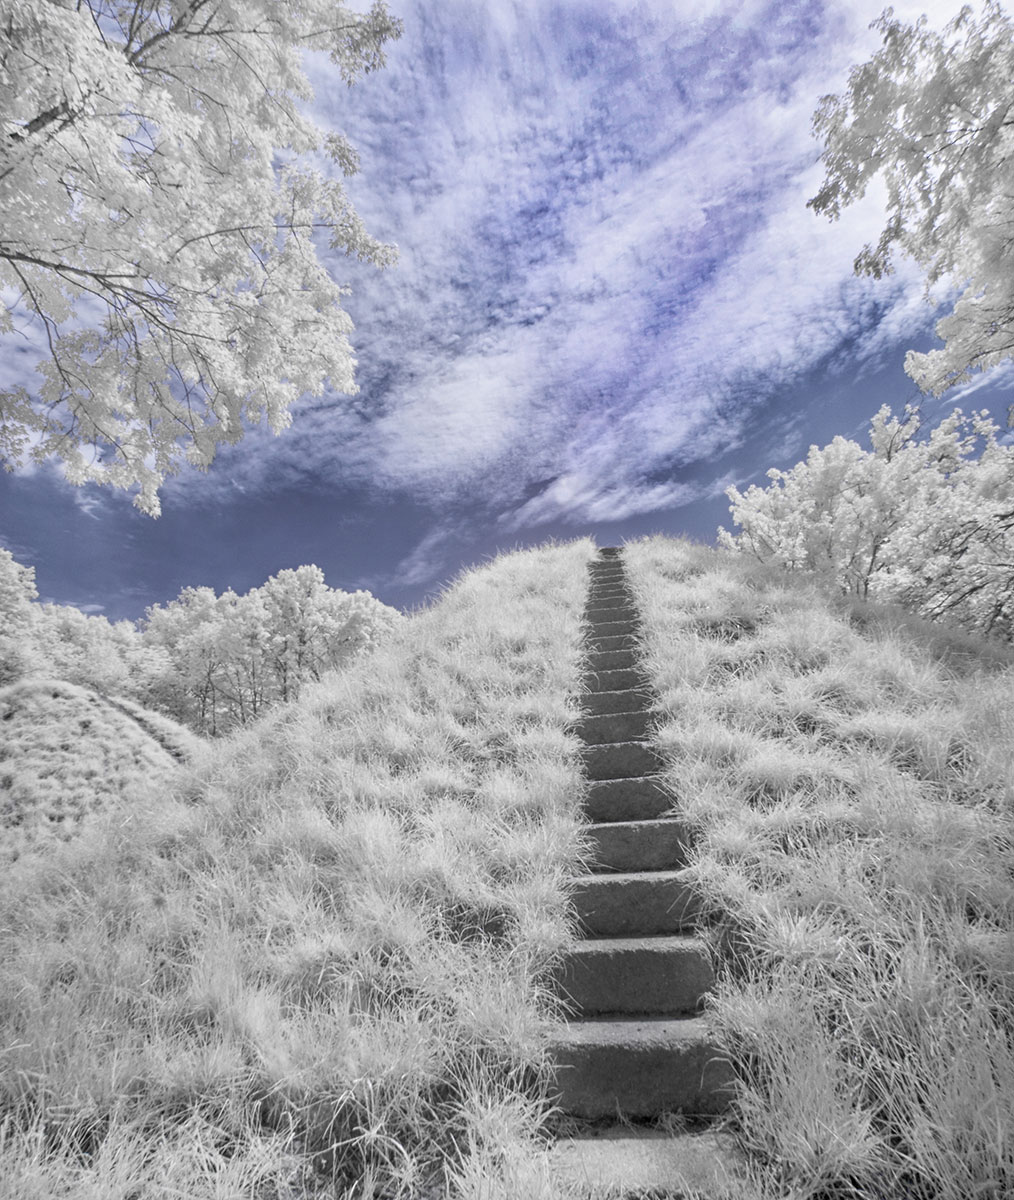
Use a Tripod when possible
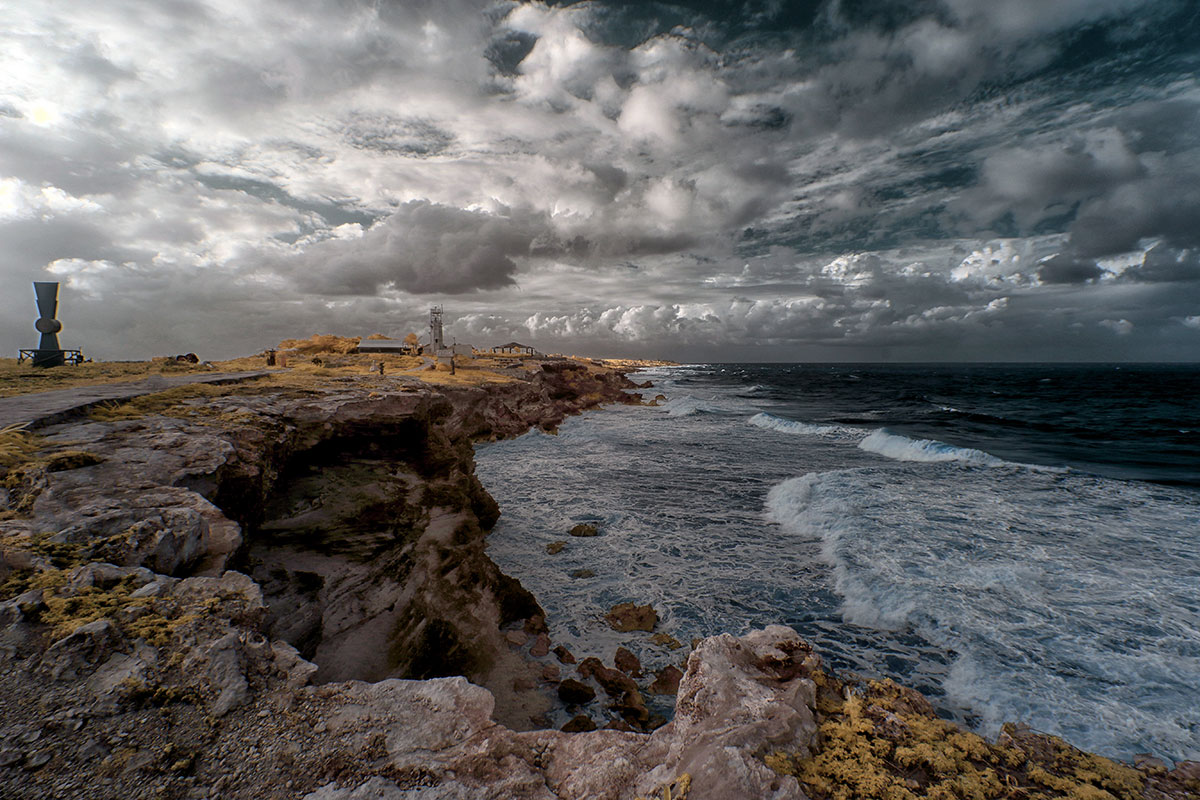
I know there are times when carrying a tripod around is something you’d rather not do, but you have the potential for better finished images if you use one. There are many light weight tripods that easily fit into a camera bag. With a tripod, you can capture longer exposures which will give your images more potential. This image would not have been possible without a tripod.
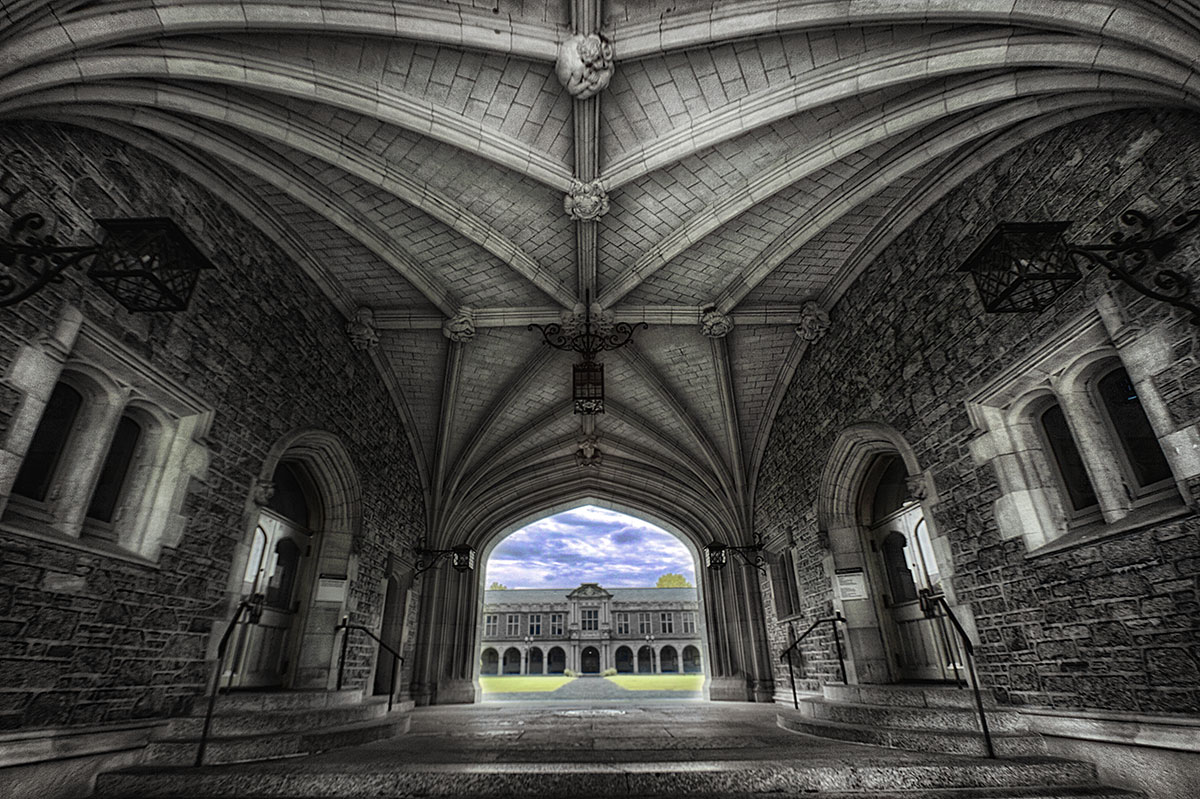
When a tripod isn’t possible I suggest carrying something like the Manfrotto pocket support. It will support a fullsize DSLR. The image below was made using the pocket support and then placing it on a flat spot in the center of the room.
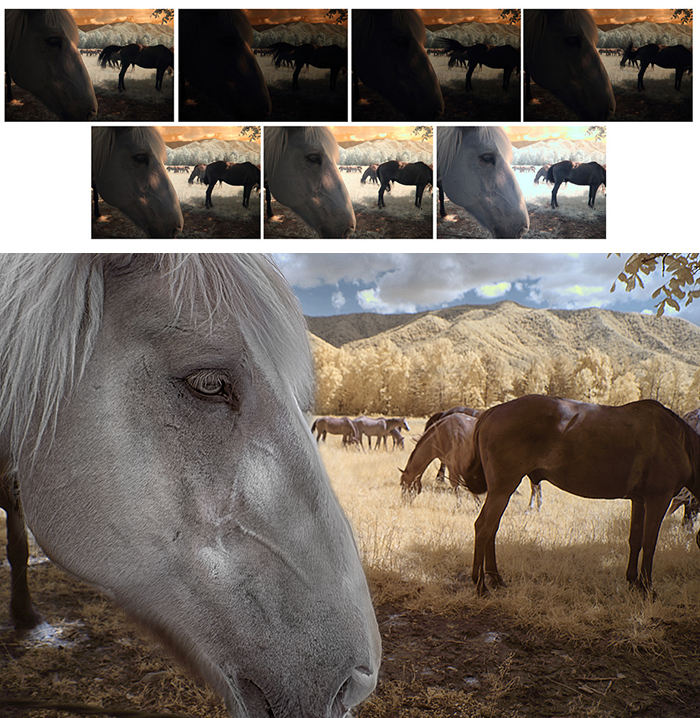
Let’s be honest though, there are times neither of those are possible. When that happens, just brace yourself, hold your breath and try it. The image below was complete and total luck. I was eating my lunch when a horse walked up close to me. I sat my sandwich down, grabbed my camera and …. got lucky. Never discount luck.
This leads us to the next point, the exposures.
The Exposures
I have found in my experience that a set of bracketed images that are slightly underexposed makes for a better Infrared HDR image than a set that is over exposed. Here’s a couple of examples of 3 exposure IR HDR images, with the 3 brackets used.

The next step is creating the HDR image.
Convert RAW files before making HDR
With natural color images, it’s not unusual to work directly from the RAW files when blending the images. With Infrared, you will need to convert your RAW files to JPGs or TIFFs first. Set your White Balance on the RAW file and then convert it.
Channel swap after Blending
There are quite a few programs out there for HDR, and I’m not going to go thru them all, but I suggest waiting until you have blended your Infrared exposures before doing your channel swapping. The color tones tend to look better.
and finally,
Don’t over do it
It’s very easy to over do it when creating an HDR image. Often the process of working the image is enjoyable, and we just “keep going”, when we shouldn’t. When in doubt, go with less rather than more. Try several versions of the same image. If you can get an impartial second opinion, do it.
As is the case with any photography, what you create is subjective. It’s your art and at the end if you are satisfied, then you succeeded.
Latest articles by Dan Wampler (see all articles)
- Seal Bay photoshoot - March 7, 2023
- Major Copyright Infringement site Scroller.com - March 6, 2023
- Kangaroo Island Wallabies and Roos - March 1, 2023
Dan Wampler
Dan Wampler is a digital artist from St Louis, MO. Having been interested in art and photography since childhood, he spent most of adult life working for Kodak and in the portrait photography industry. A student of the works of Ansel Adams, Any Warhol, and David Hamilton, Dan attempted to keep a wide range of artistic style.
As an early adopter of digital imaging, he found it gave him a way to completely incorporate art and photography. Began shooting Digital Infrared in 2004, and had first camera converted in 2006. His work has been seen in numerous gallery shows, is featured in an iTunes app. He produces Infrared and natural color digital art for sale and teaches his post-production techniques online.
Dan is LifePixel's Creative Director, social media manager, lead blog author, main workshops and training sessions instructor. His images appear in this gallery and throughout the website.
If you have a topic suggestion or request feel free to shoot him an email at danwampler@lifepixel.com
Otherwise all LifePixel customer service inquires should be directed to service@lifepixel.com or by phone at 866-610-1710.
View more of Dan's work on his Website | Facebook
See All Articles by Dan Wampler


You mentioned converting RAW to JPG or TIFF prior to making the HDR image. Can you elaborate as to why? Is that something specific to infrared HDR?
Hi Keith,
You want to convert the RAW files to JPG or TIFF when making an Infrared HDR because the RAW files do not have a White Balance.
If you try using the RAW files the color tones will not look as good.
Thanks for the explanation… I had not thought of the white balance in the combined image causing an issue but that makes sense.