• Cart
  • Checkout
  • My Account

Infrared Conversions, IR Modifications & Photography Tutorials | Life Pixel IR

The world leader in infrared conversions, modifications & DIY IR conversion tutorials. Scratched sensor replacement, UV & Full spectrum conversions.

The world leader in infrared camera conversions

866.610.1710
  • Home
  • → Start Here ←
    • 1 – Introduction
    • 2 – Filter Choices
    • 3 – Focus Calibration
    • 4 – Lens Considerations
    • 5 – Camera Considerations
    • 6 – Start Shopping
  • Galleries
    • Infrared Photography
    • Infrared Time Lapse
    • Infrared Cinematography
    • Infrared Stop Motion
    • Ultraviolet Photography
    • Forensic Photography
  • Education
    • Training Sessions
    • How To Shoot Infrared
    • AR Coated Infrared Filters
    • Lens Hot Spot Database
    • Photoshop Video Tutorials
    • Infrared Issues & Solutions
    • IR Basics in Photoshop
    • Camera Quick Start Guide
    • DIY Conversion Tutorials
    • IR Photography Primer
    • Secondhand Cameras
    • Wall Of Shame
  • Workshops
  • FAQ
  • Blog
    • Tutorials
    • Inspiration
    • Locations
    • Gear
    • News
    • Other
  • Why Choose LifePixel?
    • Submit Your Review
  • Contact
  • Shop

5 Tips for Taking Good Night Photos

Share
Pin
Tweet
Email
Share

Taking good night photos is a challenge for some, but, over time and with practice, photographers will be able to take breathtaking night photos. Taking spectacular pictures of the night sky is difficult for a lot of photography enthusiasts, but most have attempted it at least once. They can be some of the most spectacular shots you take. There are several tips that can help people improve their skills when it comes to taking night photos.
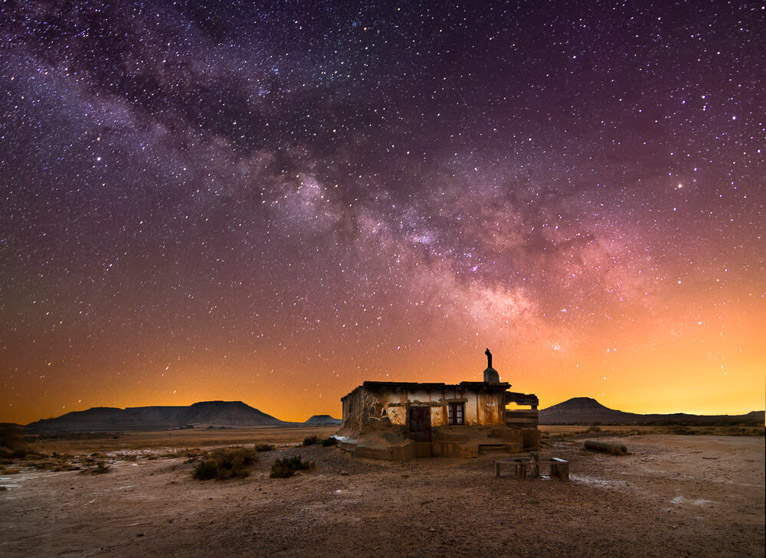
night-sky

Image source: 1

1.    Use A Tripod for Crisp and Clear Photos

Shooting at night leaves you with little light, forcing you to use slow shutter speeds ranging from 1-30 seconds. In order to compensate for those slow speeds, you will need to use a tripod if you want crisp and clear results. Make sure it’s properly setup and on solid and flat ground, so the camera will not shake in the middle of a shot. Stillness is crucial when trying to capture glowing celestial bodies that are light years away.

While your shooting, make sure you are not holding onto the tripod, because with slow shutter speeds, any slight movement can ruin your photos. If you’re attempting to take pictures of the night sky, consider using a telescope as well. Do some research for telescope reviews & guides to find out what will work best for you and your setup.

2.    Scout Your Night Time Photo Locations Early

Picking the best time to snap pictures is important, but location is equally so. Before your night time photo shoot, it saves you valuable time if you pick locations beforehand by scouting the city for the best spots that offer unique lighting and architecture. By planning ahead, you can also find out where the best place to take photos of nighttime traffic and the busiest street. City lights can interfere with the quality of your pictures. Find a spot that’s far from crowded areas.

3.    Find the Lens’ Sweet Spot

The sweet spot range for your lens is usually between f/8 and f/16. However, finding the best aperture requires you to take several test shots to find the perfect setting. By taking photos with differed apertures in the middle of the range, it allows you to capture crisp shots with your camera. It’s similar to the first pancake rule. Your first attempt will never be your best, so make sure you’re ready for when the perfect moment arrives.

4.    Proper Settings

To get good night photos, it’s recommended to shoot in manual so you can select the best aperture and shutter speed for nighttime photo shoots. First, compose and focus your shot, set the proper aperture, then set the shutter speed. Then take a few test shots and review them to see if your photos have the best exposure. Don’t forget what you’re trying to capture. Is it a shooting star or the peaceful stillness of a starry sky?

Without the right settings, all your efforts can go to waste.

5.    Keep Your Hands Off the Camera

When you take photos with long exposures at night, they can become blurry even with the slightest movement of the camera. A tripod is a start. However, using the camera’s built-in timer with automatic shutter helps avoid any problems. If timing is important to the picture, such as a shooting star, consider using a remote release instead.

Taking good night photos requires a lot of effort, but when you apply these tips, the results will be stunning. It takes patience, practice and time. Night time photos look amazing after a bit of practice. You just need to patience and determination, and you will capture some spectacular shots.

  • Latest Articles
  • Author Bio
Erik Winther

Latest articles by Erik Winther (see all articles)

  • 5 Tips for Taking Good Night Photos - December 22, 2016
Erik Winther

Erik Winther


See All Articles by Erik Winther
Share
Pin
Tweet
Email
Share

Related Posts

  • Infrared Photoshop Tutorials & Videos
    Infrared Photoshop Tutorials & Videos
  • Basic Infrared Photoshop Techniques Tutorial
    Basic Infrared Photoshop Techniques Tutorial
  • Life Pixel Modified Camera Quick Start Guide
    Life Pixel Modified Camera Quick Start Guide
  • The Wall Of Shame
    The Wall Of Shame

Filed Under: Tutorials

Leave a Reply Cancel reply

Your email address will not be published. Required fields are marked *

Blog Topics

  • Tutorials
  • Inspiration
  • Locations
  • Gear
  • News
  • Other/Misc

What our customers say:

Life Pixel has been a life-changer for me. Continue reading
Eric GConnecticut
Read more reviews
I am more than satisfied with the service I received Continue reading
Christopher JCanada
Read more reviews
I am more than pleased with the conversion job that you did Continue reading
LOUIS MWaco, Texas
Read more reviews
I am VERY impressed with his knowledge of your products and his patience in explaining it to a novice like me. Continue reading
Lynn FEssex, Maryland
Read more reviews
Things will only get better from here thanks to all of you. Continue reading
Phillip FRedding, California
Read more reviews
The Lifepixel newsletter reminds me of not having expressed my gratitude for the excellent job you made. Continue reading
Michael GGermany
Read more reviews
Your staff went above and beyond the call of duty to make sure everything was handled in an excellent manner. Continue reading
Paige RPearland, Texas
Read more reviews
It has given my old camera a new life, I will enjoy using it again. Continue reading
William PAustralia
Read more reviews
Excellent service and the camera works just great Continue reading
Hans FairhurstAustralia
Read more reviews
I just got my converted camera back from you guys. THANK YOU!!!! Continue reading
Anne CutlerForest Knolls, CA
Read more reviews
infrared_filter_choices_sidebar
ir_conversions_explained_sidebar
----------- Watch More Videos -----------
infrared_quick_start_guide

Ready to start shooting Infrared?

Convert My Camera

Subscribe To Our Newsletter

Receive updates, tips, cool tutorials, free stuff and special discounts.

Learn the Basics

  • Video
  • Start Here
  • Filter Choices
  • Focus Calibration
  • Lens Considerations
  • Camera Considerations
  • Place Your Conversion Order

Resources

  • Galleries
  • Lens Hot Spot Database
  • IR Tutorials
  • FAQ
  • Infrared Filter Choices
  • Infrared Photography Guide
  • Infrared DIY Tutorials

Company

  • Why Choose Us
  • Get In Contact
  • Job Openings
  • Write For Us
  • Affiliate Program
  • Terms of Use
  • Privacy Policy
  • Home
  • Start Here
  • Galleries
  • Tutorials
  • FAQ
  • Blog
  • Why Choose LifePixel?
  • Shop
  • Contact

Copyright © 2025 Life Pixel Infrared - All rights reserved - LifePixel Infrared Photography IR Conversion, Modification & Scratched Sensor Repair