I’m a fan of the more traditional Infrared image. Deep blacks in the sky. White puffy clouds set in contrast against said sky. Deciduous trees that bloom with a white glow. But in the past capturing these images was a bit of a chore. Long exposures. Focusing issues because of the darkness of the filters. Oh, and the ever-present danger of a light leak ruining the film and no knowing if the capture was made until it was returned from the lab.
We have it so much better today. With digital and the IR filter of our choosing we can shoot and know in real time if we are getting the exposure and focus we want/need. Alas, nothing is perfect. There is an inherent problem in my mind about digital IR. The density range can be pretty slim. When I first started my IR captures, I found the file was pretty short on the high end with lots of blown out highlights. That comes from relying on the camera metering system being which is set for the visible light spectrum. Shooting in RAW only kind of works for me as it’s difficult to predict how the image will look since the information is coming out pinkish – magenta
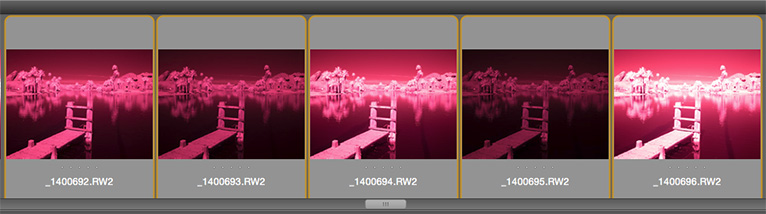
Shooting in RAW only kind of works for me as it’s difficult to predict how the image will look since the information is coming out pinkish/magenta. The advantage to having the RAW files is all the info captured by the camera at the time of exposure.
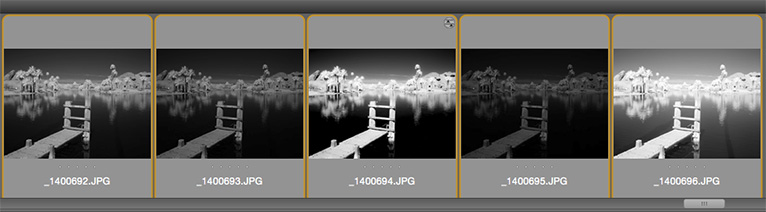
Here are the same images captured as jpegs with the camera set for black & white capture. (Note: if you set the camera for black and white and only capture in RAW then you will see the previews on the camera in BW but those previews will be stripped away when you download the files if you don’t also save jpeg files. The Lumix G6 used here can capture in RAW + jpeg.
![]()
Completed image after processing.
Having captured these exposures in all their forms gives me total control in post. Do I need all of these captures? Heck no. But, this allows me the most options to ensure the exact look I’m going for with detail in shadow areas right through to the brightest highlights. Below see the layers palette from the processing of this image.
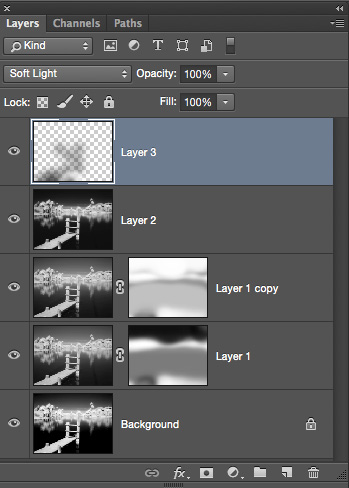
Layers Palette
Background Layer – Is the base exposure with which I wanted to start.
Layer 1 – Differing exposure to selectively pick up information in tones from a different exposure using a Layer Mask.
Layer 1 copy – A copy with the layer set to Multiply Mode to selectively darken some areas.

Layer 2 – A flattened layer containing all the changes from the layers below. This layer was then taken into NIK Color FX Pro 4 (which is now available from Google at no charge) and the Glamour Glow feature was used to bring out the glow on the palms.
Layer 3 – Layer 3 is a blank layer set to Soft Light Mode which is the method I use to dodge & burn images. Painting with black or grey will darken and using white will lighten in a non-destructive manner. I use the brush set to a low opacity about 10-20% to gently make the final adjustments.
Yours in creative Photography, Bob
PS – Questions? Let me know!
PSS – I know there aren’t any white puffy clouds in this image…
Latest articles by Bob Coates (see all articles)
- Lumix GH4 upgrade to infrared - July 2, 2021
- Bosque del Apache Wildlife Refuge - December 21, 2016
- Pre-visualization & Post Production - October 18, 2016


Hi Bob, wonderful image. Your BG layer is B&W. Did you firstly swap the channels before converting to B&W, or just go straight to B&W? This is my third conversion and have gone for the super color which is also great for B&W rather than part colour images. I’m having trouble getting the whites nice and white.
Beautiful image Bob. I notice your first layer is a B&W image. Have you already swapped the colours in Channel Mixer then converted the image to B&W before starting these layers? My camera has been converted to super color infrared and I swap the colours as per Life Pixel’s instructions for this conversion then convert to B&W but am having trouble getting the foliage white enough. Lyn (Australia)